

Hi Bob, I am interested in one of your kits. Years ago back in the 1960's I had some experience in putting a few Heathkits together but I haven't touched a soldering iron in probably 30 years. Just how difficult is it to assemble one of your kits. Also what is the advantage of using the Russian pio capacitors in the amplifier? RickyJ
3 posters
Difficulty in putting the kit together

Bob Latino- Admin
- Posts : 3262
Join date : 2008-11-26
Location : Massachusetts
Hi Ricky,
The ST-70/ST-120 amp kits are not all that hard to put together as electronics kits go. You don't really need any knowlege of electrical circuits to sucessfully assemble either amp kit. If you can follow directions, use simple hand tools (wire stripper/cutter, screwdriver and pliers) and solder with a soldering pencil you can put either amp kit together. I have had now four customers that never put ANY electronics kit together sucessfully assemble one of the VTA kits. Only one of the four needed a little help by Email. For the other three, the amp just worked when they turned it on. The assembly manual is written for the beginner. If you do run into an issue during assembly you can Email or phone me for support.
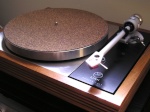
Amplifiers are always easier to put together than preamps because you have no selector switches, volume or tone controls on an amplifier. The chassis of the ST-70/120 is fairly large at 9 1/2 inches by 13 inches and there aren't any real tight spots. If you have Russian PIO coupling caps then it cuts down on the space a little to put in the front tube sockets. That's about the only "tight spot" in whole assembly. Basically the assembly goes as follows.
1. You put the driver board together. Place the parts onto the board and solder them in.
2. Screw the parts onto the chassis - tube sockets, transformers, choke, terminal strips etc.
3. Wire up the chassis parts
4. Connect the driver board to the chassis and wire the driver board into the circuit
The total time to complete assembly is usually 10 to 15 hours. You should do the assembly over probably 3 (or more) days. If you rush the assembly and try to do too much in one day you can get tired and start to make errors. After you do each step you check what you did against either the pictorial diagram or the color photo. If you made a mistake you will see it immediately. If the step is done correctly you put a check beside that step number and continue on.
Re: The Russian K40-Y PIO (Paper In Oil) capacitors. These are military grade capacitors that are extremely durable and IMHO excellent sounding capacitors. They are equal or better sounding than caps costing 5 or 10 times their price. I measure their capacitance and then hit each and every one of them with high voltage. I then place them in sets of 4 that are matched within 1%. I have used over 1000 of these caps in the last 5 years. Not one Russian cap (that I know of) has ever failed. These 4 caps are very important because they carry the audio output signal from the driver board to each of the 4 output tubes. You want the audio signal passed from the driver board to each output tube as accurately as possible. They take about 100 to 200 hours to break in and sound their best.
Bob
The ST-70/ST-120 amp kits are not all that hard to put together as electronics kits go. You don't really need any knowlege of electrical circuits to sucessfully assemble either amp kit. If you can follow directions, use simple hand tools (wire stripper/cutter, screwdriver and pliers) and solder with a soldering pencil you can put either amp kit together. I have had now four customers that never put ANY electronics kit together sucessfully assemble one of the VTA kits. Only one of the four needed a little help by Email. For the other three, the amp just worked when they turned it on. The assembly manual is written for the beginner. If you do run into an issue during assembly you can Email or phone me for support.
Amplifiers are always easier to put together than preamps because you have no selector switches, volume or tone controls on an amplifier. The chassis of the ST-70/120 is fairly large at 9 1/2 inches by 13 inches and there aren't any real tight spots. If you have Russian PIO coupling caps then it cuts down on the space a little to put in the front tube sockets. That's about the only "tight spot" in whole assembly. Basically the assembly goes as follows.
1. You put the driver board together. Place the parts onto the board and solder them in.
2. Screw the parts onto the chassis - tube sockets, transformers, choke, terminal strips etc.
3. Wire up the chassis parts
4. Connect the driver board to the chassis and wire the driver board into the circuit
The total time to complete assembly is usually 10 to 15 hours. You should do the assembly over probably 3 (or more) days. If you rush the assembly and try to do too much in one day you can get tired and start to make errors. After you do each step you check what you did against either the pictorial diagram or the color photo. If you made a mistake you will see it immediately. If the step is done correctly you put a check beside that step number and continue on.
Re: The Russian K40-Y PIO (Paper In Oil) capacitors. These are military grade capacitors that are extremely durable and IMHO excellent sounding capacitors. They are equal or better sounding than caps costing 5 or 10 times their price. I measure their capacitance and then hit each and every one of them with high voltage. I then place them in sets of 4 that are matched within 1%. I have used over 1000 of these caps in the last 5 years. Not one Russian cap (that I know of) has ever failed. These 4 caps are very important because they carry the audio output signal from the driver board to each of the 4 output tubes. You want the audio signal passed from the driver board to each output tube as accurately as possible. They take about 100 to 200 hours to break in and sound their best.
Bob
Tube Nube- Posts : 707
Join date : 2008-12-06
Age : 60
Location : Calgary, AB
Rick,
I was about in the same boat as you since the last time I touched a soldering iron. I read some builder reviews somewhere on the net, can't recall where, attesting to how clear and straight forward the building is, even for a complete novice.
It is as Bob describes it, and he's there to help -- even on a Sunday afternoon sometimes, if I recall correctly. ;-)
Go for the PIO caps -- just take an extra 2 minutes to think about what you're doing when installing them.
It was a pleasure to build, and the feeling of accomplishment is hard to beat, as this thing looks and sounds so good. Your friends will be surprised it was a kit.

vav2sab- Posts : 6
Join date : 2010-09-08
Hi Bob,
I'm a newbie who, since the last weekend, is an owner of a pretty well preserved ST-70 (no signs of rust, all original stock parts inside including Mullard tubes, bias still adjustable, tested carefully - the amp still runs, no hum, just heard some "scratching" sound in the right channel during the warm-up, etc.). Of course, my intention is to take the essential preventive measures like replacement of driver caps, selenium rectifier, bias filter caps, maybe quad... I intend to use the mentioned Russian PIO caps for the driver board. The question is, if I should choose the values same as original or opt for some higher (say 0.22uF@500V). Is this valid for the 0.5uF caps too?
I am also new in kit building / vintage modifying - how do you measure capacitance (digital multimeter with appropriate function, bridge) and what does it mean "to hit caps with high voltage"?
Thanks a lot in advance!
Vytas
Regensburg, Germany
Bob Latino- Admin
- Posts : 3262
Join date : 2008-11-26
Location : Massachusetts
vav2sab wrote:Hi Bob,
I'm a newbie who, since the last weekend, is an owner of a pretty well preserved ST-70 (no signs of rust, all original stock parts inside including Mullard tubes, bias still adjustable, tested carefully - the amp still runs, no hum, just heard some "scratching" sound in the right channel during the warm-up, etc.). Of course, my intention is to take the essential preventive measures like replacement of driver caps, selenium rectifier, bias filter caps, maybe quad... I intend to use the mentioned Russian PIO caps for the driver board. The question is, if I should choose the values same as original or opt for some higher (say 0.22uF@500V). Is this valid for the 0.5uF caps too?
I am also new in kit building / vintage modifying - how do you measure capacitance (digital multimeter with appropriate function, bridge) and what does it mean "to hit caps with high voltage"?
Thanks a lot in advance!
Vytas
Regensburg, Germany
Hi Vytas,
Yes - On the stock board you can take the four coupling caps from .10 uF to .22 uF. The interstage caps that are .05 uF now you can go up to .10 uF. All caps should be at least 400 volt.
On a stock ST-70 those main coupling caps look at maybe -34 (negative 34) on one side and 250 volts on the other side - a swing of about 300 volts. A 400 volt cap should be OK.
"Hitting the caps with high voltage" means testing a cap by running high voltage through it (400 - 500 volts) to see if it fails. I do that with every Russian PIO cap that goes out with a kit. I have never had a single failure of one of these Russian PIO coupling caps. On a stock ST-70 the 630 volt Russian PIO's are probably best because the 1000 volt versions are just alittle too large to fit the area available to place the cap.
Bob
|
|
|