The Dynaco Tube Audio Forum

Would you like to react to this message? Create an account in a few clicks or log in to continue.
The Dynaco Tube Audio Forum

Dedicated to the restoration and preservation of all original Dynaco tube audio equipment - Customer support for Tubes4hifi VTA tube amp and preamp kits and all Dynakitparts.com products


+3
sganz
Sal
j beede
7 posters

    Restoring Mark III transformers

    j beede
    j beede


    Posts : 473
    Join date : 2011-02-07
    Location : California

    Restoring Mark III transformers Empty Restoring Mark III transformers

    Post by j beede Wed Feb 09, 2011 9:40 pm

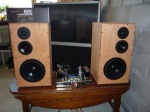
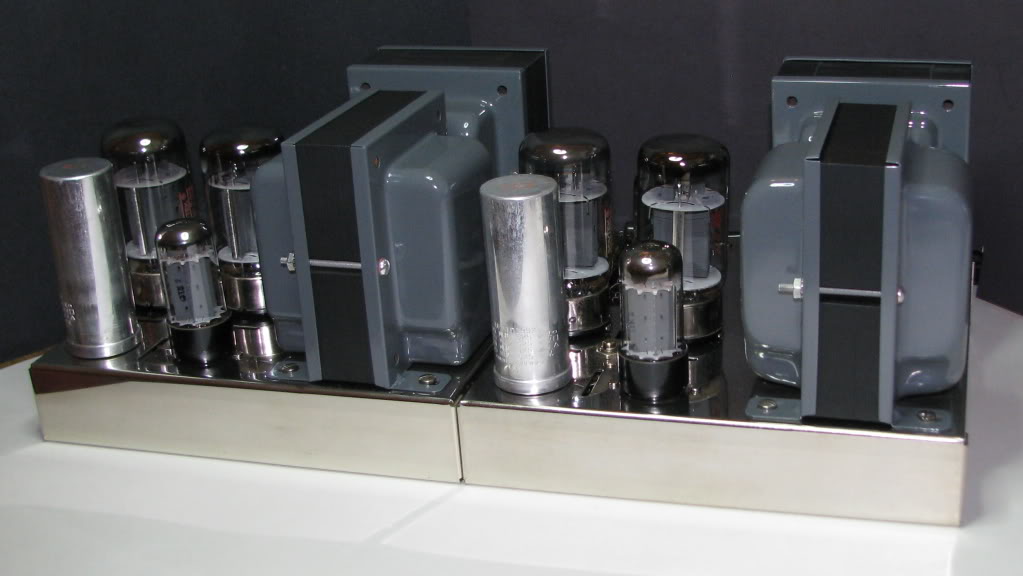
    I've got both Mark IIIs running on the bench now... they still need plenty of work (hum, nasty flux everywhere and some melted wires from poor soldering, etc.). While I decide what to do circuit-wise I am going to do some clean up and polishing. The plated pieces are cleaning up nicely. I am going to have the transformer bells plated. I have a little surface rust on the laminations, what do you guys do about that? The transformers are the type with cloth insulated leads. I intend to add short runs of heat shrink tubing on each wire only where the wires pass through the chassis as a precautionary measure.
    ...j


    Last edited by j beede on Thu Feb 10, 2011 2:18 am; edited 1 time in total
    Sal
    Sal


    Posts : 221
    Join date : 2009-02-05
    Location : Central New Jersey Dynaco-ST70.com

    Restoring Mark III transformers Empty Re: Restoring Mark III transformers

    Post by Sal Thu Feb 10, 2011 12:35 am

    I have sanded the end bells and transformer core, gave them 2 coats of Rustoleum black primer and 2 coats of Rustoleum semi-gloss black paint. You can see before and after pictures at http://www.tuberadios.com/dynaco-st70/restore.html

    Sal
    j beede
    j beede


    Posts : 473
    Join date : 2011-02-07
    Location : California

    Restoring Mark III transformers Empty Re: Restoring Mark III transformers

    Post by j beede Thu Feb 10, 2011 4:17 pm

    Very nice work Sal. That amplifier presents itself very nicely. I will either paint or plate the end bells on my Mark III transformers--I know that "purists" prefer the factory gray. I do prefer the look of unpainted laminations. I wonder if I risk doing damage if I use a brass wire brush on the cores while... I would then clear coat them with satin or matte poly.
    ...j
    j beede
    j beede


    Posts : 473
    Join date : 2011-02-07
    Location : California

    Restoring Mark III transformers Empty Re: Restoring Mark III transformers

    Post by j beede Tue Feb 22, 2011 10:00 pm

    Anyone know what the stock finish on the laminations should be? I have just a hint of surface rust on my laminations and I would rather avoid the painted black look. I was thinking of wire brushing off the rust and then using clear satin poly. Problem is the laminations don't brush to nice uniform color. What has worked well for you?
    ...j
    sganz
    sganz


    Posts : 3
    Join date : 2011-03-04
    Location : Los Angeles, California

    Restoring Mark III transformers Empty Re: Restoring Mark III transformers

    Post by sganz Sat Mar 05, 2011 3:56 pm

    I just started the same work on 3 of almost dead ebay Mark III's, in retrospect should have just called Kevin at Dynakit and got new transformers too from him (got the rest of the parts) Wink Oh well, in for a dime in for a dollar.

    I have 3 of sets or transformers and what looks like a mix and match of transformers, some cloth, some mixed, and one vinyl leaded units.

    I pulled all the bells, most were the wrap around the core edge style and one out of the 6 was a flat bell. Also looks like mix and match on the bells too, number stampings were for power bells on output transformers. Some evil doer had their hands in this mess.

    Just got into cleaning them up. Put the bells in a vibratory polisher and some media that cleaned them up very nicely ready for primer and paint. Now the couple of questions -

    • Some transformers had 2 bolts (center) holding the bells together some had 4 (Outers), is it better to user 2 or 4 or all 6 to hold the transformer together?

    • A couple of the core have some rust on the tops and used a scotch bright pad and now what to do? Black Paint?

    • Should I worry about the one transformer with loose laminations?


    Picked up some stainless screws, kep nuts and new fiber washers from McMaster Carr as well to clean up the corroded ones that were on the transformers.

    Seems like a few of us are about at the same point in the rebuilds Very Happy

    Sandy
    j beede
    j beede


    Posts : 473
    Join date : 2011-02-07
    Location : California

    Restoring Mark III transformers Empty Re: Restoring Mark III transformers

    Post by j beede Sun Mar 06, 2011 3:53 am

    I got one set of transformers done today. I wire brushed the cores and used a very light coat of Rustoleum gloss black with no primer. Hated how they looked with the gloss black--uneven, too thick and too much shine. I removed the gloss black with lacquer thinner and tried again with a very thin coat of Rustoleum flat black... Much better! I used gray primer then gloss dark gray Rustoleum on the bells and they look good. It is not easy to get a smooth, even gloss coat using spray cans. I got my second 25-50-25-25µF, 900V cap board built while the bells were drying. Mark III number one should be done tomorrow. One more set of transformers to pull and paint and that should just about do it. I am looking for a set of quieter 6an8... then I will be in good shape.
    mantha3
    mantha3


    Posts : 303
    Join date : 2010-11-10

    Restoring Mark III transformers Empty Re: Restoring Mark III transformers

    Post by mantha3 Sun Mar 06, 2011 8:46 pm

    High Heat Rustolium (did I spell that right?) black semi gloss works and looks great if you are doing black. This is made for grills etc... I have my Bob Latino ST120 transformers painted with this. This is the paint Bob recommends in his build instructions.

    I think they make this in gray too.
    sganz
    sganz


    Posts : 3
    Join date : 2011-03-04
    Location : Los Angeles, California

    Restoring Mark III transformers Empty Re: Restoring Mark III transformers

    Post by sganz Mon Mar 07, 2011 1:41 am

    I painted the bells of the transformers with Granite Gray (recommended by Kevin at Dynakit) and I just shot one transformer core with Satin Black with a primer under. Looks OK, a bit thick as J Beede mentioned, but will see when its fully dry. I had one transformer done with flat black primer but look too unfinished.

    One thing I did to the core before painting was to use a block of wood to make all the laminations flat. That helped a lot with the look of the core.

    I had an interesting thought after painting the transformer core in that I put in the 4 corner screws and tightened them all up to hold the core together. Now wondering when I release it will it just crack all the new paint as tension is released.

    I have a can of the BBQ black as well I might give one a try with that. Forgot my nuts and bolts at work so will try to put the painted one together and see how it looks. It might be getting the lacquer thinner treatment as well.

    Sandy
    j beede
    j beede


    Posts : 473
    Join date : 2011-02-07
    Location : California

    Restoring Mark III transformers Empty Re: Restoring Mark III transformers

    Post by j beede Mon Mar 07, 2011 2:24 am

    The first coat of glossy dark gray Rustoleum looked best on the covers. I used a very thin coat of Rustoleum flat black on the cores and am happy with the results. The flat black is fragile, I may put a layer of matte clear on the laminations. I just got the first Mark III back together after pulling the transformers. Looks great, but sounds the same Smile
    Restoring Mark III transformers Powertransformer-1


    Last edited by j beede on Wed Mar 09, 2011 12:07 am; edited 1 time in total
    mantha3
    mantha3


    Posts : 303
    Join date : 2010-11-10

    Restoring Mark III transformers Empty Re: Restoring Mark III transformers

    Post by mantha3 Mon Mar 07, 2011 10:04 am

    Sharp!

    Well Done
    Sal
    Sal


    Posts : 221
    Join date : 2009-02-05
    Location : Central New Jersey Dynaco-ST70.com

    Restoring Mark III transformers Empty Re: Restoring Mark III transformers

    Post by Sal Mon Mar 07, 2011 11:01 am

    Very nice!

    Sal
    sganz
    sganz


    Posts : 3
    Join date : 2011-03-04
    Location : Los Angeles, California

    Restoring Mark III transformers Empty Re: Restoring Mark III transformers

    Post by sganz Mon Mar 07, 2011 12:21 pm

    Looks very good!
    j beede
    j beede


    Posts : 473
    Join date : 2011-02-07
    Location : California

    Restoring Mark III transformers Empty Re: Restoring Mark III transformers

    Post by j beede Mon Mar 07, 2011 4:58 pm

    I had planned to go with black on the bells like Sal's ST-70 but when I sprayed the gray primer on I guess I got nostalgic for the stock look. The glossy "dark gray" contrasts nicely with the flat black laminations with the amps back in the listening room. The glossy bells reflect more tube glow than the old dull did Smile. The mounting screws tore up the new Rustoleum more easily than I expected (24 hour cure)... Next time I paint transformer covers I may use fiber or clear washers under those screw heads.
    j beede
    j beede


    Posts : 473
    Join date : 2011-02-07
    Location : California

    Restoring Mark III transformers Empty Re: Restoring Mark III transformers

    Post by j beede Fri Mar 11, 2011 4:18 pm

    Now I am not so sure about using Rustoleum on transformer covers. Even after several days of "curing" the Rustoleum is still somewhat soft and has deformed, sort of oozing, around the fiber washers holding the bells on. I used two coats of primer and two coats of glossy dark gray. In hindsight I should have stopped after one coat of gloss gray as the second coat was not as uniform as the first.

    By now I am getting pretty good at uninstalling and reinstalling the transformers--but it is still not something I look forward to doing again! My original idea was to have the covers plated or powder coated--that may have been the path I should have taken. Next time.
    ...j
    j beede
    j beede


    Posts : 473
    Join date : 2011-02-07
    Location : California

    Restoring Mark III transformers Empty Re: Restoring Mark III transformers

    Post by j beede Fri Mar 11, 2011 4:45 pm

    FYI: Just spoke to Rustoleum tech support. They said that "hard" cure time for the 2x product is 7 to 10 days(!) not 24 hours like it reads on the can. After what I have observed I believe them. They said that applying heat to force curing may alter color uniformity. Guess.... I..... need..... to...... slow..... down......
    avatar
    GP49


    Posts : 792
    Join date : 2009-04-30
    Location : East of the sun and west of the moon

    Restoring Mark III transformers Empty Re: Restoring Mark III transformers

    Post by GP49 Fri Mar 11, 2011 5:08 pm

    j beede wrote:FYI: Just spoke to Rustoleum tech support. They said that "hard" cure time for the 2x product is 7 to 10 days(!) not 24 hours like it reads on the can. After what I have observed I believe them. They said that applying heat to force curing may alter color uniformity. Guess.... I..... need..... to...... slow..... down......

    With enamel, which Rustoleum™ is, the actual hard-cure occurs by oxidation and takes from days...to forever, depending on the formulation. It can be sped up by baking and with additives. Without those, what happens in 24 hours is solvent-drying.

    Most automotive enamels have additives to promote rapid hard-curing. Back some decades, some cheap paint places ("I'll paint ANY car for $29.95!") didn't use them and you could dig a fingernail into the paint after a month! Cheap used car lots had plenty of cars like that.
    avatar
    tubenewbe


    Posts : 9
    Join date : 2011-03-06

    Restoring Mark III transformers Empty Re: Restoring Mark III transformers

    Post by tubenewbe Fri Mar 11, 2011 10:17 pm

    G now I'm worried I used Plastikote black wrinkle paint on my st-70 power transformer top end bell and it sits while running at 145 to 150 deg. Looks cool though the output transformers are stock and look almost shinny and in between them is the wrinklecoat transformer, realy stands out.
    Dave
    j beede
    j beede


    Posts : 473
    Join date : 2011-02-07
    Location : California

    Restoring Mark III transformers Empty Re: Restoring Mark III transformers

    Post by j beede Fri Mar 11, 2011 10:46 pm

    Now they tell me! Yes, my freshly (22 hours ago) enameled transformer covers can be slightly dented with a finger nail. The second set of covers is under the IR lamp now. Well, they sure are nice to look at. I will reassemble the second amp later tonight and see if the (OT) paint hardens by playing lots of BIG BAND jazz. I need more of the old style covers that partly cover the laminations anyway, so I will be sanding and painting again in the future. Plating or powder coating is looking better all the time.
    avatar
    GP49


    Posts : 792
    Join date : 2009-04-30
    Location : East of the sun and west of the moon

    Restoring Mark III transformers Empty Re: Restoring Mark III transformers

    Post by GP49 Sat Mar 12, 2011 12:53 am

    You could also bake the enamelled end bells in the oven to speed the hard-curing.
    j beede
    j beede


    Posts : 473
    Join date : 2011-02-07
    Location : California

    Restoring Mark III transformers Empty Re: Restoring Mark III transformers

    Post by j beede Sat Mar 12, 2011 2:13 am

    The oven is tempting... do you care to suggest a temperature?
    ...j
    avatar
    GP49


    Posts : 792
    Join date : 2009-04-30
    Location : East of the sun and west of the moon

    Restoring Mark III transformers Empty Re: Restoring Mark III transformers

    Post by GP49 Sat Mar 12, 2011 5:04 am

    I was going to suggest 300°F but did a quickie Google search, and found this:

    How to Bake Enamel Paint
    j beede
    j beede


    Posts : 473
    Join date : 2011-02-07
    Location : California

    Restoring Mark III transformers Empty Re: Restoring Mark III transformers

    Post by j beede Sun Mar 13, 2011 9:59 pm

    I ended up using an IR lamp which hardened the enamel enough to let me reassemble the amps. Now the amps look great while they make music. Now I can get to work on the cages.
    ...j

    Restoring Mark III transformers Mark3pairfrontnice110313
    sandy
    sandy


    Posts : 36
    Join date : 2011-03-04
    Age : 61
    Location : Los Angeles, CA

    Restoring Mark III transformers Empty Re: Restoring Mark III transformers

    Post by sandy Tue Mar 15, 2011 1:16 pm

    That sounds like a pain. I think I used the same paint but had a couple of days dry time. I also used an electric heater on the day to keep them nice and warm then let them sit for a couple more (well not my choice).

    One thing I did notice is that I used Kep Nuts on the back and just tightened them up and did not even have to hold the screw end to get it really tight. The Kep nut spins on the star washer and all looked good with no paint tearing on either side. I think from the pics you have a lot more paint (thicker and much nicer job then mine) that may also be a contribute a bit.

    For the core I ended up finding that a mist of flat black primer then a mist of Satin Black paint worked out OK for me. Not original looking but really nice vs. what they were. I'm going to start a build thread with some pics so I don't hijack too much of your thread Very Happy

    Slowly moving forward!

    Sandy
    j beede
    j beede


    Posts : 473
    Join date : 2011-02-07
    Location : California

    Restoring Mark III transformers Empty Re: Restoring Mark III transformers

    Post by j beede Tue Mar 15, 2011 3:39 pm

    I used two coats of gray primer and two wet coats of dark gray glossy. Yes, this is way thicker than the factory paint which is ultra thin and applied without primer as far as I can tell. 10 hours of IR lamp (~150°F surface) gave the covers a nice epoxy-coated feel. Much easier to work with. I had zero paint damage installing the covers where I used fiber washers and the factory nuts with built-on star washers. Mounting the transformers--them wiggling them to get them parallel to the chassis (didn't really need to do that) chewed up the paint on the top of the mounting flanges a bit.

    Restoring Mark III transformers Powertransformer-1

    Sponsored content


    Restoring Mark III transformers Empty Re: Restoring Mark III transformers

    Post by Sponsored content


      Current date/time is Fri Apr 19, 2024 1:18 pm