The Dynaco Tube Audio Forum

Would you like to react to this message? Create an account in a few clicks or log in to continue.
The Dynaco Tube Audio Forum

Dedicated to the restoration and preservation of all original Dynaco tube audio equipment - Customer support for Tubes4hifi VTA tube amp and preamp kits and all Dynakitparts.com products


4 posters

    Mark III Rebuild

    sandy
    sandy


    Posts : 36
    Join date : 2011-03-04
    Age : 61
    Location : Los Angeles, CA

    Mark III Rebuild Empty Mark III Rebuild

    Post by sandy Tue Mar 15, 2011 1:32 pm

    Just started working on a bunch of EBay MkIII's that were in really bad shape. The chassis were really in bad shape on the top due to huge pits and corrosion. The transformers looked really bad too when I got them and after looking at the mess decided to give Kevin at Dynakitparts a call. Here is the mess -

    Pulled Transformers

    Mark III Rebuild Imag0310

    Closer view of the Mess
    Mark III Rebuild Imag0311

    Transformer Bells Catching some Paint
    Mark III Rebuild Imag0410

    Baking the Bells
    Mark III Rebuild Imag0411


    Last edited by sandy on Tue Mar 15, 2011 1:45 pm; edited 1 time in total (Reason for editing : Added some pics)
    sandy
    sandy


    Posts : 36
    Join date : 2011-03-04
    Age : 61
    Location : Los Angeles, CA

    Mark III Rebuild Empty Re: Mark III Rebuild

    Post by sandy Tue Mar 15, 2011 1:57 pm

    Now onto the cores -

    Black Rustoleum Primer and then Satin Black. Cores were cleaned up with Scotch Brite and a bit of sandpaper where it was really bad. The trick seems to be just enough primer to cover then just enough satin black to cover the primer. Where it gets too thick you loose the look of the lamination look. The output transformer was held with 4 bolts to keep the cores packed solid and they were previously aligned flat with a small block of wood. The power transformer was dipped in some sort of shellac and was solid and fine without the screws.

    Garbage can makes a good platform for paint!

    Mark III Rebuild Imag0412

    Mark III Rebuild Imag0413

    Mark III Rebuild Imag0415
    j beede
    j beede


    Posts : 473
    Join date : 2011-02-07
    Location : California

    Mark III Rebuild Empty Re: Mark III Rebuild

    Post by j beede Tue Mar 15, 2011 3:51 pm

    You started with some nasty looking transformers... as bad as I've seen. I see that you have a mix of cover styles... some of the squarer style and some of the more rounded. I am looking for spares of either if anyone has any. I have small brown PAS-2 knobs to trade Smile. Did you use chemical stripper or a wire brush or something else to get the corrosion off?

    Yes, I used the thinest possible coating on the lmainations to avoid the "flooded" look. Rustoleum flat black is fragile when dry, I may use matte clear as a topcoat next time. I used Rusoleum's 2x coverage dark gray glossy on the covers and its cure time is far longer than 24 hours.
    ...j
    sandy
    sandy


    Posts : 36
    Join date : 2011-03-04
    Age : 61
    Location : Los Angeles, CA

    Mark III Rebuild Empty Re: Mark III Rebuild

    Post by sandy Wed Mar 16, 2011 1:14 am

    For the transformer bells I tossed them into a vibratory tumbler (used for metal polishing and cleaning) it's behind the heater in the top posts pics. It removed the rust and roughed up the paint a bit (Didn't remove it) and I then hand sanded them a bit until I had no more patience and just shot the paint. They could have used a second coat of Granite Gray.

    For the cores I used a couple of kitchen style scotch bright pads that did a very good job on all except some of the bad rust/corrosion on them. I used a bit of 320 grit paper to clean that up. The Scotch bright pad did a nice job on them including the shellac.

    I have them all assembled back and again, while not perfect the will look great and I feel they were brought back from the dead!

    Yes on the mix and match of bells, some the rounder style, 1 pair the squared up a bit and a pair that are the flat style. I'm sure I mixed them up but I figured with the top on it won't bother me too much.

    I will get more pics, as it goes. The hard part is done.

    Sandy

    sandy
    sandy


    Posts : 36
    Join date : 2011-03-04
    Age : 61
    Location : Los Angeles, CA

    Mark III Rebuild Empty Re: Mark III Rebuild

    Post by sandy Tue May 03, 2011 6:58 pm

    Been slow, got some parts mounted on stainless chassis, but forgot to get a couple of parts that should be in hand soon. Better pics coming from a real camera soon Wink

    Mark III Rebuild Imag0410
    mantha3
    mantha3


    Posts : 303
    Join date : 2010-11-10

    Mark III Rebuild Empty Re: Mark III Rebuild

    Post by mantha3 Tue May 03, 2011 7:50 pm

    Nice! Looks sharp thus far. Nice paint job on the transformers and some brand new Stainless. Keep the photos coming. I dig these re-build threads
    sandy
    sandy


    Posts : 36
    Join date : 2011-03-04
    Age : 61
    Location : Los Angeles, CA

    Mark III Rebuild Empty Re: Mark III Rebuild

    Post by sandy Fri Jul 01, 2011 2:26 am

    Back after a bit and have completed the pair of amps. Here are the pics (Lots)

    Underside of chassis
    Mark III Rebuild P1000013


    Under Chassis 1
    Mark III Rebuild P1000110

    Under Chassis 2
    Mark III Rebuild P1000111

    Under Chassis 3
    Mark III Rebuild P1000112

    Transformers
    Mark III Rebuild P1000113

    Triode Electronics Driver Board
    Mark III Rebuild P1000114

    Amp Front, or is it the Back Very Happy
    Mark III Rebuild P1000115

    With the original cover
    Mark III Rebuild P1000116

    And What the original chassis looked like
    Mark III Rebuild P1000117

    sandy
    sandy


    Posts : 36
    Join date : 2011-03-04
    Age : 61
    Location : Los Angeles, CA

    Mark III Rebuild Empty Re: Mark III Rebuild

    Post by sandy Fri Jul 01, 2011 3:01 am

    Well here is a bit of a recap on what I had to do -

    Picked up 3 MKIII Ebay specials, really ended up all in bad shape upon arrival. They were factory assembled versions from what it looked like due to rivets on the tube sockets. They had been hacked up pretty good with some new caps, but still not something I would have plugged in.

    Chose to do a full overhaul, saving really only the power transformers and the power cord!

    Picked up most of the parts including the nice stainless chassis from DynakitParts.com and driver boards from TriodeElectronics.com

    McMaster Carr supplied the stainless transformer bolts and kep nuts, and the fiber washers. Home Depot had the granite gray paint and satin black, cloth wire from TubesAndMore.com

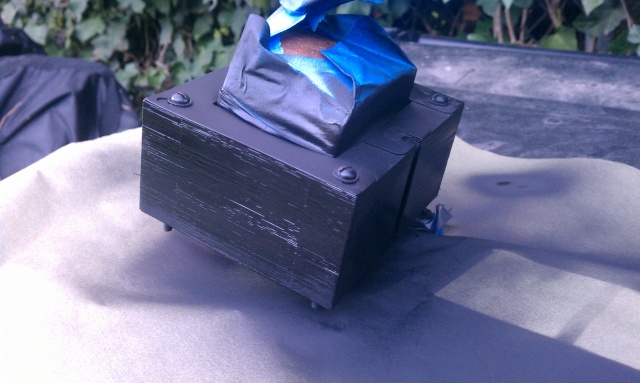
    Stripped and painted Transformers, let the bells dry for a bit next to an old electric heater. The very dirty and transformer cores were cleaned with a combination of scotch bright and sand paper where badly corroded. Masked off most parts, and bolted them together with old bolts prior to painting. Painted first with a light coat of black primer, then after drying, shot a light coat of Satin Black paint. Let them dry for a while since I was slow at the next step.

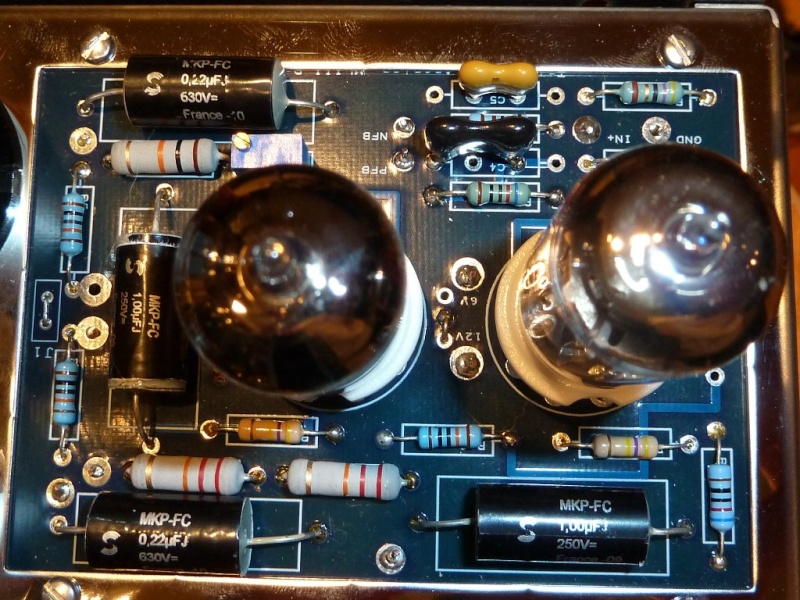
    Assembled the Triode driver board, then basically followed the Dynakit instruction to wire up the amp, which was pretty straightforward, the Triode driver board has an over abundance of instructions for those that want to modify it, but after getting through that it was very simple to wire it into the Dynaco amp. About the only thing that was different was a couple of wire lenghts, other then that the numbers on the board match up to the original Dynaco's and easy to wire up.

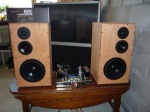
    What's left? I have the original covers that are in ok shape and may just give them a cleaning and be done with it. It was amazing how nice the covers were compared to the amps (Which means they may have been just pieced together).

    And on fire up tubes filiments glowed orange, tossed in the correct bias and nothing exploded, smoked or turned red, so success it seems.

    Tubes are JJ KT88's and ECC802S in the Driver with the a JJ GZ34 rectifier

    And that is the story with these amps. This is my second tube project, the first was my ST120 from you know who...

    And one thing as a side note from the money spent perspective, I likely would have been better off just picking up a pair of NEW MKIII's from Dynakitparts.com and saved a bit of time with the transformer clean up and would have spent about the same amount of money since I could only reuse the transformers and amp covers when all said and done.

    What next? Possibly an ST35 or a Grommes 260A from scratch

    Sandy
    Sal
    Sal


    Posts : 221
    Join date : 2009-02-05
    Location : Central New Jersey Dynaco-ST70.com

    Mark III Rebuild Empty Re: Mark III Rebuild

    Post by Sal Fri Jul 01, 2011 8:57 am

    Sandi,
    Great job on your restoration. The amps are looking great!

    Sal
    sandy
    sandy


    Posts : 36
    Join date : 2011-03-04
    Age : 61
    Location : Los Angeles, CA

    Mark III Rebuild Empty Re: Mark III Rebuild

    Post by sandy Sat Jul 02, 2011 3:22 am

    Thanks!

    Sponsored content


    Mark III Rebuild Empty Re: Mark III Rebuild

    Post by Sponsored content


      Current date/time is Fri Apr 26, 2024 5:49 am