The Dynaco Tube Audio Forum

Would you like to react to this message? Create an account in a few clicks or log in to continue.
The Dynaco Tube Audio Forum

Dedicated to the restoration and preservation of all original Dynaco tube audio equipment - Customer support for Tubes4hifi VTA tube amp and preamp kits and all Dynakitparts.com products


+4
Roy Mottram
Bob Latino
Tom
ValleySounds
8 posters

    VTA120 Custom Build

    avatar
    ValleySounds


    Posts : 20
    Join date : 2012-09-25
    Location : Calgary, Ab

    VTA120 Custom Build Empty VTA120 Custom Build

    Post by ValleySounds Sun Nov 11, 2012 12:40 am

    I thought its about time I posted on the forum to say hello, and start a thread about my build. I wanted to do another DIY amp build using the KT88 in push pull to get around 60 -75 watts. After searching "the net" I came to the conclusion that Bob's kit really fit the bill. Plus it has great assembly instructions and a very large support community. The only downside that I could find was that I think the original dynacos are ugly (no offence to anyone in my first post I hope). It is just not my taste and I dont think I would be happy with it sitting on the rack.

    After choosing Bob's kit I came up with a plan for a few mods. First off was solid state rectification. Then I wanted to ditch the quad cap based solely on looks. This already left the factory chassis out of the question since empty holes are ugly.

    So I've set out to start the build with a custom chassis. I have a couple sheets of 1/8" aluminum that are 17.5" wide x 12 deep. The rest of the chassis will be made from a 40 pound block of zebra wood I've been procrastinating on cutting down.

    Started the chassis by getting the 2 sides and front panel cut (and mounting the power button)
    VTA120 Custom Build DSCF2004

    I drilled the top/bottom plate mounting holes, Then transferred the holes to front and side panels. After that I mounted hardware on the plates that line up with the holes in the front side panels.
    VTA120 Custom Build DSCF2007

    I used 4-40 nuts that are 6mm long. The standoffs are used as screws to hold the nuts on the plate. The nuts will be epoxied into the wood panels to facilitate removal and install of the top and bottom with no threat of stripping out wood.
    VTA120 Custom Build DSCF2006

    Epoxy used and come clamping with light pressure. Each top and bottom was left for 24 hours to let the glue set completely
    VTA120 Custom Build DSCF2008
    VTA120 Custom Build DSCF2009

    More to come.....
    avatar
    ValleySounds


    Posts : 20
    Join date : 2012-09-25
    Location : Calgary, Ab

    VTA120 Custom Build Empty Re: VTA120 Custom Build

    Post by ValleySounds Sun Nov 11, 2012 12:55 am

    After this was done I could do the final sanding, drilling, milling, and cutting on the wood parts. I then stained the wood a little darker and sealed it with 3 coats of satin poly. Part of the initial plan was to add a 100 mv analogue bias meter to the front panel.

    Heres what it looks like now

    VTA120 Custom Build DSCF2016

    VTA120 Custom Build DSCF2018

    I have started doing some lay out and drilling of the top panel to get an idea of how everything will look. Did a mock up and took a pic.

    VTA120 Custom Build DSCF2019
    VTA120 Custom Build DSCF2022

    This is as far as i've got so far. I will keep posting progress and pics as I go.
    PS. I will not be using the cap clamps. They are ugly also. If anyone has some suggestions on holding the caps in place let me know.

    Thanks for looking.
    avatar
    Tom


    Posts : 217
    Join date : 2011-04-04

    VTA120 Custom Build Empty Re: VTA120 Custom Build

    Post by Tom Sun Nov 11, 2012 8:00 am

    I like it! Where did you find the transformer covers?
    Bob Latino
    Bob Latino
    Admin


    Posts : 3262
    Join date : 2008-11-26
    Location : Massachusetts

    VTA120 Custom Build Empty Re: VTA120 Custom Build

    Post by Bob Latino Sun Nov 11, 2012 9:39 am

    Hi Steve,

    Your custom VTA ST-120 is looking great! I like the mock up idea in advance to see how it will look. That zebra wood has some outstanding grain. Keep adding to this thread with more pics and text as you finish the build. I love to see build threads like this. It shows that you can assemble a 60 WPC push/pull tube amp in a variety of different ways.

    Bob
    avatar
    ValleySounds


    Posts : 20
    Join date : 2012-09-25
    Location : Calgary, Ab

    VTA120 Custom Build Empty Re: VTA120 Custom Build

    Post by ValleySounds Sun Nov 11, 2012 9:12 pm

    Tom wrote:I like it! Where did you find the transformer covers?

    I think I got those from Analogue Metric DIY found here "Click me"
    avatar
    Tom


    Posts : 217
    Join date : 2011-04-04

    VTA120 Custom Build Empty Re: VTA120 Custom Build

    Post by Tom Mon Nov 12, 2012 7:28 pm

    ^Nice source. Thanks for the heads up!
    Smile
    Roy Mottram
    Roy Mottram
    Admin


    Posts : 1839
    Join date : 2008-11-30

    VTA120 Custom Build Empty Re: VTA120 Custom Build

    Post by Roy Mottram Tue Nov 13, 2012 4:39 pm

    you probably don't have large holes in the top plate for those capacitors, but if you could add them then you could use the cap mounts on the underside with all but 1/2" or so of the large caps coming up thru the top.
    I did a similar version of this 6 or 7 years ago, see below

    VTA120 Custom Build ST80a
    Tube Nube
    Tube Nube


    Posts : 707
    Join date : 2008-12-06
    Age : 60
    Location : Calgary, AB

    VTA120 Custom Build Empty Re: VTA120 Custom Build

    Post by Tube Nube Tue Nov 13, 2012 10:00 pm

    Beauty, eh?!
    avatar
    quad


    Posts : 15
    Join date : 2010-11-25

    VTA120 Custom Build Empty Re: VTA120 Custom Build

    Post by quad Wed Nov 14, 2012 3:58 am

    Wow...it's the season of beautiful custom builds. Great work, looks awesome and well thought out.
    avatar
    ValleySounds


    Posts : 20
    Join date : 2012-09-25
    Location : Calgary, Ab

    VTA120 Custom Build Empty Re: VTA120 Custom Build

    Post by ValleySounds Thu Nov 15, 2012 12:55 pm

    Thanks for the tip on the caps. I think I came up with a solution but its going to have to wait until I get some more material. I have been waiting 3 weeks for a piece of aluminium for the back panel. I'm sure it got lost in the mail so I am a little behind.

    I did finish the drilling on the top plate, And painted it yesterday. Now I can start some of the assembly while I wait for the rest.
    I didn't count the holes but there was a lot. Every hole is marked, then center punched, then drilled to 1/16, then the final drilling, then de-burring,
    then finally countersinking the required holes.

    If you dont have lots of time or patience do yourself a favour and buy a chassis lol.

    I still have to drill the bottom cover for cooling, The back panel, And the tranformer covers (backside for cooling)

    VTA120 Custom Build DSCF2023
    avatar
    ValleySounds


    Posts : 20
    Join date : 2012-09-25
    Location : Calgary, Ab

    VTA120 Custom Build Empty Re: VTA120 Custom Build

    Post by ValleySounds Mon Nov 11, 2013 1:56 pm

    Wow I came back to this thread to find out I never finished telling you guys how the amp turned out.
    Here is a list of some of the changes I implicated into my design.

    Bulgin power switch with AMB epsilon 24 driver board and AMB sigma 24 transformer board.

    40 Amp SS relay.

    50 mm fan to cool diodes and drop down resistor. Exhausts through holes around power tubes.

    SS Rectifier and 40 Ohm drop down resistor.

    Mundorf Tubecaps. 100uf + 100uf + 47uf. The 2 100uf caps are driving the transformers + Bobs SCM (mounted on blank pcb). 47uf is dedicated to the driver board. Running a 5.8 Ohm resistor between 2nd 100uf and 47uf cap. Gives me 385 volts to the driver board.

    2 Triad Magnetics c-17x chokes between the 100uf caps

    100mv analogue meter and switches to check bias on power tubes. (1 Ohm 3 watt cathode resistors instead of 10 Ohm 2 watt resistors. Figured this out from Skizo's thread)

    IEC power connector and a master power switch.

    The circuit is all Bob and Roy except the power supply.
    Here are some internal pics. There has been changes made since these pics. Mostly a new driver board. I did some cap changes and lifted some traces from my first board. Now I am trying out the russian pio caps. I rerouted some wires to make it look cleaner when installing the new board.
    The black goop seen on parts around the amp are "liquid electrical tape" on all the high voltage connections and amp chassis where open connections are close to chassis.

    VTA120 Custom Build DSCF2043_zpsa1158a8e


    Back pannel
    VTA120 Custom Build DSCF2039_zps48bec30d


    I smoked a bias resistor and redplated a kt88.
    VTA120 Custom Build DSCF2045_zps6a54f232


    Triode pentode switch on really nice turret boards. Resistor stack working on getting the voltages right to the driver board.
    VTA120 Custom Build DSCF2051_zps4ff5529d


    Interior of back pannel.  The fan runs off 12vdc from the AMB epsilon24 driver board.
    VTA120 Custom Build DSCF2056_zps2296225d
    avatar
    ValleySounds


    Posts : 20
    Join date : 2012-09-25
    Location : Calgary, Ab

    VTA120 Custom Build Empty Re: VTA120 Custom Build

    Post by ValleySounds Mon Nov 11, 2013 2:00 pm

    And some pics of the finished amp

    VTA120 Custom Build DSCF2068_zpsd21adf5f

    VTA120 Custom Build DSCF2069_zps14b62db5

    Powered on
    VTA120 Custom Build DSCF2070_zpsd84e35e8
    sKiZo
    sKiZo


    Posts : 1530
    Join date : 2013-04-01
    Location : Michigan USA

    VTA120 Custom Build Empty Re: VTA120 Custom Build

    Post by sKiZo Mon Nov 11, 2013 3:06 pm

    Jeez ... I go away to make some popcorn and you go and finish the amp! No 

    Looks like one major difference between you and me is, you actually had a plan when you started. Not to mention I cheated by having Panel Express do the hard work on the chassis ... I started out on the drill press here and decided early on that was beyond my capabilities. I also went kit and let Bob do most of the shopping for me. Well, that and your blazing speed ... total time start to finish?

    Beautiful build. Certainly a work of art and something to be proud of ...

    VTA120 Custom Build Clap-animated-animation-clap-smiley-emoticon-000340-large

    PS ... glad to see I was of some help in your build. Those meters gave me fits, but it all worked out in the end and they've come in right handy for monitoring the amp. Not fair though ... I had several points where I'd soldered myself into a corner ... you had to have at least one?

    I'd hate to have all this popcorn go to waste ... jocolor
    Bob Latino
    Bob Latino
    Admin


    Posts : 3262
    Join date : 2008-11-26
    Location : Massachusetts

    VTA120 Custom Build Empty Re: VTA120 Custom Build

    Post by Bob Latino Mon Nov 11, 2013 4:12 pm

    Hi Steve,

    Glad to see the final results and the photo of the interior wiring ... A real nice custom build of the VTA ST-120 ...

    Bob
    avatar
    ValleySounds


    Posts : 20
    Join date : 2012-09-25
    Location : Calgary, Ab

    VTA120 Custom Build Empty Re: VTA120 Custom Build

    Post by ValleySounds Mon Nov 11, 2013 4:53 pm

    sKiZo wrote:Jeez ... I go away to make some popcorn and you go and finish the amp! No 

    Looks like one major difference between you and me is, you actually had a plan when you started. Not to mention I cheated by having Panel Express do the hard work on the chassis ... I started out on the drill press here and decided early on that was beyond my capabilities. I also went kit and let Bob do most of the shopping for me. Well, that and your blazing speed ... total time start to finish?

    Beautiful build. Certainly a work of art and something to be proud of ...

    VTA120 Custom Build Clap-animated-animation-clap-smiley-emoticon-000340-large

    PS ... glad to see I was of some help in your build. Those meters gave me fits, but it all worked out in the end and they've come in right handy for monitoring the amp. Not fair though ... I had several points where I'd soldered myself into a corner ... you had to have at least one?

    I'd hate to have all this popcorn go to waste ... jocolor
    I thought about using panel express but I had no idea what the layout was going to be like until I had the kit in hand. I did use their software to start the design but every hole I added was $$. Lots of parts had to be assembled and moved around the chassis to find the proper mounting position. Then mark holes, disassemble, and drill in proper place. From the whole amp I only had 1 hole not work out as planned (the angled choke should have been straight but the tranny cover mount plate covered it and it couldn't be used). I designed the top cover on the computer, printed a template and started making holes (thought my auto center punch was going to wear out)
    Total time of build was right around 2 weeks of working on it in the evenings. There was a few breaks in between while I waited for parts to arrive.
    There was a bit of troubleshooting right from the beginning but I think thats what DIY  is about.
    The mv meter just sat unused in the amp while I read and read and read about how to make it work. Was a way easier to do then I thought.
    My voltage at home is sitting right at 122 volts all the time. It took a bit to get the amp into spec where I didnt have to run it from a variac. Thats the 40 Ohm resistor right after the diodes. I got 524 dc on the first cap, 518 dc on second feeding the output transformers and 385 dc on the third feeding the driver board. Without the current draw of the power tubes its right around 585 dc on the first cap bom 
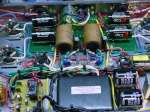
Heat is take care of from the fan on the resistor and diodes. Doesnt even get warm. Power tranny still gets hot but im going to put a fan on the back of the cover.
    I pulled a bit of hair getting a bias issue fixed. A big puff of smoke from a resistor. A lot of part swapping to get it voiced to my liking(still in progress tongue but I like the russian pios so far)
    This amp just loves the new kt-120's and it drives my DIY 91db speaks to wall shakin levels.
    It sounds much nicer then my very very modified Jolida 801.

    Next may be one of Roy's preamps made to match the amp.


    Last edited by ValleySounds on Wed Dec 18, 2013 6:11 pm; edited 1 time in total
    arledgsc
    arledgsc


    Posts : 496
    Join date : 2012-11-30
    Age : 70
    Location : Santa Rosa CA

    VTA120 Custom Build Empty Re: VTA120 Custom Build

    Post by arledgsc Mon Nov 11, 2013 5:11 pm

    Nice one and you should be proud.  The inspiration makes me want to get out the tube design  books and come up with something for the Tung Sol KT150s.  But I admire the cabinetry and metal work something of which I am not very good.  Well done!


    Last edited by arledgsc on Tue Nov 12, 2013 4:51 pm; edited 1 time in total
    sKiZo
    sKiZo


    Posts : 1530
    Join date : 2013-04-01
    Location : Michigan USA

    VTA120 Custom Build Empty Re: VTA120 Custom Build

    Post by sKiZo Tue Nov 12, 2013 4:49 pm

    I didn't mess much with layout until I had all the parts I planned to use, then laid those out on a paper template. That was perfect to scale with the PE design. Once the holes are in the metal, it's hard to change your mind.

    I agree, Panel Express was a bit expensive, but I figured I'd still have plenty stuff to screw up without messing with the chassis plate any more than I had to. As is, I only ordered the odd shaped holes and those that would be exposed when the amp was done. Saved some that way. Tried doing it myself with 3003 aluminum but wasn't happy with the results. Still fun trying, and I still got all my fingers. tongue

    One last minute change before clicking the buy button was increasing the diameter of the driver tube holes by a couple mm each. Good move, as I was around 1 mm off in my estimates of dead center.  That could also have been how the sockets were mounted. There's some slop factor available, so next time I'll be sure to just tack a couple pins first and double check before soldering them in.

    Didn't actually smoke anything here, but I did red plate a tube when one of my cheap pots went south. Last item on the list is replacing those. Also looking to put a fan in the bottom cover ... that extra depth in the case will allow that easily. Maybe I'll get to use that 24v PS I was planning to use for the switch light ... maybe even hook up the switch light!

    So ... now that it's "done" ... anything you would have done different? Right now, only thing I might change is adding a center channel with it's own attenuator, and replacing the jumper at R39 with a linear 10k pot so I could adjust the range on the bias pots. I did have doubts about where I put those pots and the test points (those wandered around a LOT before I finally cut the holes), but that's worked out quite well.
    avatar
    ValleySounds


    Posts : 20
    Join date : 2012-09-25
    Location : Calgary, Ab

    VTA120 Custom Build Empty Re: VTA120 Custom Build

    Post by ValleySounds Tue Nov 12, 2013 8:10 pm

    I wouldnt change much if I was doing it again. I wanted 1 more inch of depth in the top plate to help fit all the stuff I have on the back panel, but the cost of aluminum goes up dramatically when you want a piece that is 13" x 17" instead of 12" x 17". It all fit good though.
    I would run dual bias meters instead of the single and have them illuminated. Still might add a light though.

    These questions are making me want to build another kit. Maybe an VTA ST70 so I can biamp the speakers.

    Whats next for you? If you want a center channel you should figure out a way to do 3 MK3's in one chassis Laughing
    sKiZo
    sKiZo


    Posts : 1530
    Join date : 2013-04-01
    Location : Michigan USA

    VTA120 Custom Build Empty Re: VTA120 Custom Build

    Post by sKiZo Tue Nov 12, 2013 8:53 pm

    This is what got me thinking center channel ... if I'd run across that while planning, pretty sure I would have thrown that in too.

    VTA120 Custom Build Dynaco-center-channel

    That's a for real Dynaco option published back in the day, and could be a neat mod to any of the ST series. Simple enough to do, and Bob tells me 16 ohm is available in the ST120 anyway. As mentioned, I'd also add a separate volume control, and maybe a shelf filter, as you don't really need a big box in the middle. Also more power for the side channels if you cut the bass there.

    PS ... all that might just be doable with the current amp. I'd have to cut a new back panel, but that's just screwed together. No more Mokare wood, but I could chunk off the top of the old panel and just glue that to some plain old pine to keep the look. Hmmmmm ...

    Do keep those Velleman meters I used in mind if you do another build. The big scale is nice. If I add that 24v power supply, it'd be easy to tap a couple small holes for LEDs below the scales too. I'd think the fluted edges should do a nice job of spreading the light over the face. You gotta pop the cover off (that just clips on) to cut the internal shunt resistor anyway.

    My BIG concern was noise from adding a separate power supply for lighting. LEDs tend to be kinda loud anyway. I take it that's not been a problem? I can also see where some blue undercarriage lights might be kinda kewl too. Bling!
    avatar
    ValleySounds


    Posts : 20
    Join date : 2012-09-25
    Location : Calgary, Ab

    VTA120 Custom Build Empty Re: VTA120 Custom Build

    Post by ValleySounds Tue Dec 17, 2013 9:23 pm

    Well I did add some lights to the bias meter. I ended up wiring the Led's from the time delay board to the meter. Mounted a couple lights in the meter and hooked it all up. Works great.

    VTA120 Custom Build DSCF2112_zps655e6287


    A quick vid of it in action. The lights are not nearly as bright as the video shows.
    sKiZo
    sKiZo


    Posts : 1530
    Join date : 2013-04-01
    Location : Michigan USA

    VTA120 Custom Build Empty Re: VTA120 Custom Build

    Post by sKiZo Tue Dec 17, 2013 10:31 pm

    Pretty trick ... I don't have the TDR board, but I'm sure there's several points I could tap power for dial lights.

    I've been looking into dual purposing my dual meters and setting them up as VU's too. Doesn't seem like it'd be all that difficult.

    Maybe add an hour counter too.

    Your video reminds me ... I have to replace the power switch one of these days too. The ring light went blooie ... doesn't affect operation, but I liked it when it worked. Sealed unit, so it's basically a throwaway.

    Couple other projects ahead of it, but it's that time of the year ... winter closes in, and I tend to find more time to kill at the bench ...
    avatar
    Guest
    Guest


    VTA120 Custom Build Empty Re: VTA120 Custom Build

    Post by Guest Wed Dec 18, 2013 11:04 am

    I was thinking of doing some work on my amp as well. Should the sides be covered with metal too?
    sKiZo
    sKiZo


    Posts : 1530
    Join date : 2013-04-01
    Location : Michigan USA

    VTA120 Custom Build Empty Re: VTA120 Custom Build

    Post by sKiZo Wed Dec 18, 2013 4:26 pm

    I didn't install side metal and haven't had any issues.

    One thing I do have on my to do list for the next ship session is to add ground straps to the chokes. Those are just screwed into the wood. No electrical issues, but with that much metal mass, I don't suppose it'd hurt to install grounds as noise drains ...

    VTA120 Custom Build Left-choke

    As you can see, I did do a back plate behind the wood, and that's common ground to the main chassis plate.

    Sponsored content


    VTA120 Custom Build Empty Re: VTA120 Custom Build

    Post by Sponsored content


      Current date/time is Fri Apr 26, 2024 4:17 am