The Dynaco Tube Audio Forum

Would you like to react to this message? Create an account in a few clicks or log in to continue.
The Dynaco Tube Audio Forum

Dedicated to the restoration and preservation of all original Dynaco tube audio equipment - Customer support for Tubes4hifi VTA tube amp and preamp kits and all Dynakitparts.com products


+5
ruffian
nmchiefsfan
Bob Latino
ValleySounds
mike mytko
9 posters

    Finished my ST 120 Build

    avatar
    mike mytko


    Posts : 8
    Join date : 2012-10-16
    Age : 54
    Location : Bowmanville, Ontario, Canada

    Finished my ST 120 Build Empty Finished my ST 120 Build

    Post by mike mytko Tue Dec 04, 2012 6:35 pm

    Finished my ST 120 Build 20121201_104501

    Finished my ST 120 Build 20121128_204224

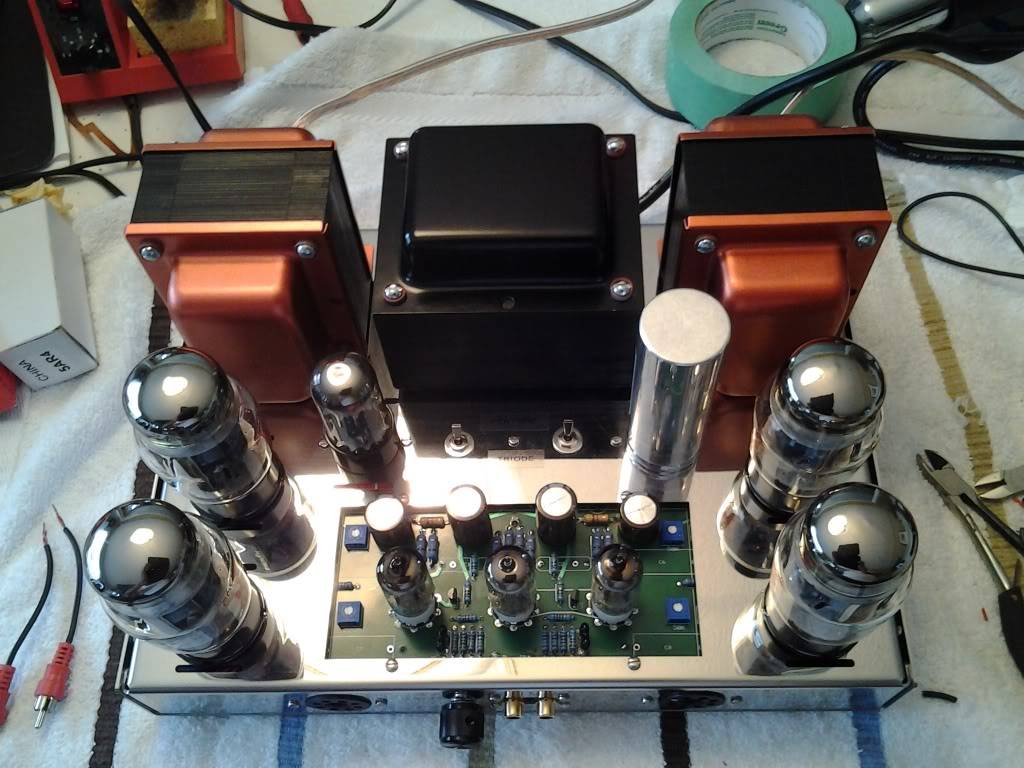
    I just finished my ST120 Build.  What a great experience and a great kit.

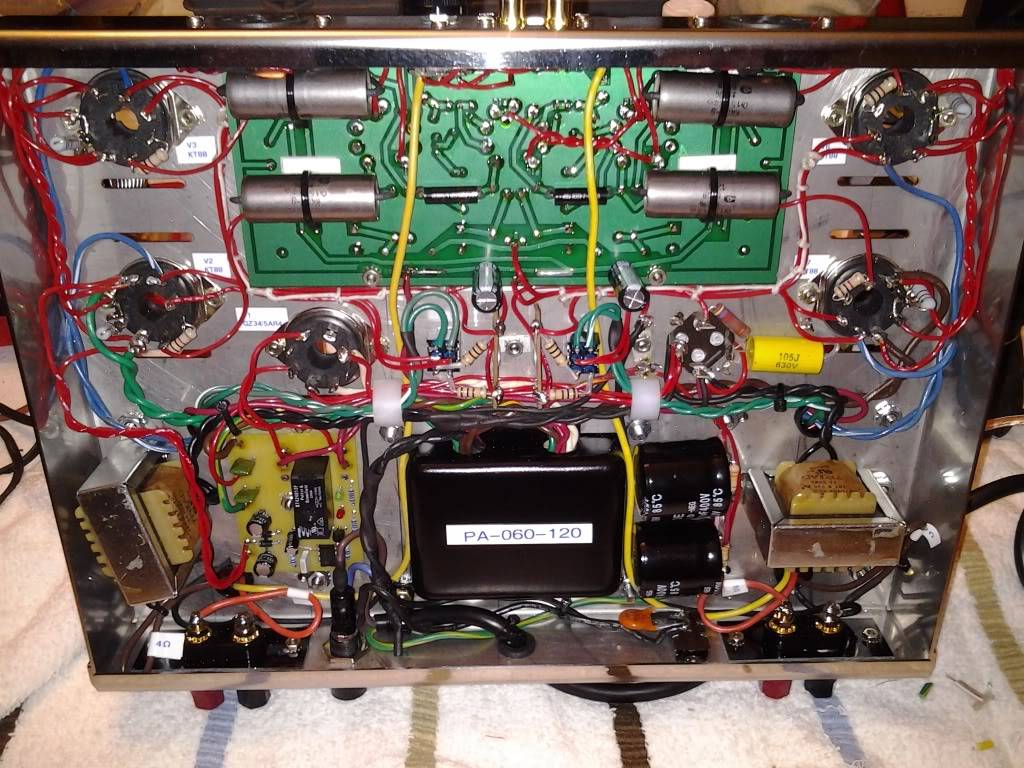
    This amp sounds great. At first i thought it wasnt working it was so quiet. I mean its silent.  Even after the few little changes i did.  I ended up using stranded tefzel wire. I did ground the chasis, also I am not switching the neutral but rather the hot.  Both work but it is safer this way.  I also put an x/y line rated 0.01mfd cap across the switch. Figure it might save the contacts over the years.  I replaced the chinese rectifier tube with a Sovtek. Noticed my bias went up, so i re biased. All in all a beautifull build.  I tried my hand at the lost art of wire lacing with waxed lacing string.  Turns out it takes a bit of practice.  so is stoped. See attached. Also, used one of the unused connections on each of the front sockets to add a chasis ground test point.  This was i avoid risking scratching the chasis with my meter leads when adjusting the bias.

    I posted a bunch of photos at this link

    http://photobucket.com/mydynaco

    Thanks Bob

    Mike Mytko
    Ontario, Canada
    avatar
    ValleySounds


    Posts : 20
    Join date : 2012-09-25
    Location : Calgary, Ab

    Finished my ST 120 Build Empty Re: Finished my ST 120 Build

    Post by ValleySounds Tue Dec 04, 2012 7:15 pm

    Beautiful build there Mike.
    I like the copper paint on the trannies.

    Steve
    Bob Latino
    Bob Latino
    Admin


    Posts : 3263
    Join date : 2008-11-26
    Location : Massachusetts

    Finished my ST 120 Build Empty Re: Finished my ST 120 Build

    Post by Bob Latino Tue Dec 04, 2012 7:24 pm

    Hi Mike,

    I put a couple of your photos with along your post above. As ValleySounds has said, the copper colored paint on the transformer bells really looks nice ... Your inside wiring is very well done also .. Everyone should take a look at your complete series of photos at the link you posted above ...

    Re: > "At first i thought it wasnt working it was so quiet. I mean its silent .." If you build these amps properly (as you have done), ALL the VTA amps, be it the VTA ST-70, ST-120 or the M-125 monoblocks, are dead silent at idle.

    Bob


    Last edited by Bob Latino on Thu May 23, 2013 4:38 pm; edited 1 time in total
    avatar
    nmchiefsfan


    Posts : 77
    Join date : 2012-03-21

    Finished my ST 120 Build Empty Re: Finished my ST 120 Build

    Post by nmchiefsfan Tue Dec 04, 2012 7:41 pm

    Beautiful!
    avatar
    mike mytko


    Posts : 8
    Join date : 2012-10-16
    Age : 54
    Location : Bowmanville, Ontario, Canada

    Finished my ST 120 Build Empty Re: Finished my ST 120 Build

    Post by mike mytko Tue Dec 04, 2012 8:55 pm

    Yes, thanks for complements. The pictures Bob posted are not yet the finished amp. On the link i posted is the amp with some more wire lacing done to it. I remember working on an old aircraft receiver as a kid and they did a beautifull job with wax lacing string. Needless to say, im not that good at it! I think it is very difficult to wire something neatly that has round sockets as well as the need to maintain certain distance between ac heater wires and signal. As an electrician I am used to wiring large industrial panels were everything is straight, square and either parallel or perpindicular to each other. Wireways called panduct make everything look neat. This amp was a small challenge. Looking at Bobs builds, if you dont care for doing the assembly part yourself, then having Bob Built the amp is worth every penny! For me its all about the build.

    Mike


    Last edited by mike mytko on Fri Dec 14, 2012 7:38 am; edited 2 times in total
    avatar
    ruffian


    Posts : 43
    Join date : 2010-02-26

    Finished my ST 120 Build Empty Re: Finished my ST 120 Build

    Post by ruffian Wed Dec 05, 2012 12:59 am

    Looks great. I like the way the flat metallic copper paint looks. I think it is so much nicer than a glossy shine.
    avatar
    mike mytko


    Posts : 8
    Join date : 2012-10-16
    Age : 54
    Location : Bowmanville, Ontario, Canada

    Finished my ST 120 Build Empty Re: Finished my ST 120 Build

    Post by mike mytko Thu Dec 06, 2012 12:09 am

    Hi
    Looks like copper but actually a red metalic engine paint. I had to bake the transformer covers in the oven to get it to cure. Stunk up the house a bit!
    avatar
    Sprags


    Posts : 123
    Join date : 2013-02-27

    Finished my ST 120 Build Empty Re: Finished my ST 120 Build

    Post by Sprags Fri Mar 15, 2013 9:57 pm

    Very nice job!
    avatar
    mike mytko


    Posts : 8
    Join date : 2012-10-16
    Age : 54
    Location : Bowmanville, Ontario, Canada

    Finished my ST 120 Build Empty Re: Finished my ST 120 Build

    Post by mike mytko Sat Mar 16, 2013 9:50 am

    Thanks
    baddog1946
    baddog1946


    Posts : 319
    Join date : 2010-02-03
    Location : Costa Rica

    Finished my ST 120 Build Empty Re: Finished my ST 120 Build

    Post by baddog1946 Sat Mar 16, 2013 5:59 pm

    AM I MISSING SOMETHING? WHY ARE THERE TWO RED WIRE CONNECTIONS BETWEEN THE LEFT AND CENTER DRIVER TUBES? THIS DOES NOT EXIST ON ANY OF MY 3 AMPS. WHAT DO THEY DO THERE?
    Bob Latino
    Bob Latino
    Admin


    Posts : 3263
    Join date : 2008-11-26
    Location : Massachusetts

    Finished my ST 120 Build Empty Re: Finished my ST 120 Build

    Post by Bob Latino Sat Mar 16, 2013 6:09 pm

    baddog1946 wrote:AM I MISSING SOMETHING? WHY ARE THERE TWO RED WIRE CONNECTIONS BETWEEN THE LEFT AND CENTER DRIVER TUBES? THIS DOES NOT EXIST ON ANY OF MY 3 AMPS. WHAT DO THEY DO THERE?

    Hi George,

     You have the older 12AT7 board on your amps and they didn't require filament jumpers. The newer CCS boards require two filament jumpers on the board that are not needed on your board.

    ADDED 6/21/16 > The newer VTA CCS driver boards now have the filament wire jumpers inside the traces of the driver board. As such, those filament jumper wires as seen in Mike's amp are not required anymore.

    Bob


    Last edited by Bob Latino on Thu Jul 21, 2016 7:13 am; edited 1 time in total
    baddog1946
    baddog1946


    Posts : 319
    Join date : 2010-02-03
    Location : Costa Rica

    Finished my ST 120 Build Empty Re: Finished my ST 120 Build

    Post by baddog1946 Sat Mar 16, 2013 8:23 pm

    Hi Bob:
    Thanx for the info.
    I have an unbuilt octal board with CCS I haven't used yet does it also need that jumper? It didn't mention it in the board build info. Are there any other differences I should know about if I install it in one of my older amps?
    Roy Mottram
    Roy Mottram
    Admin


    Posts : 1837
    Join date : 2008-11-30

    Finished my ST 120 Build Empty Re: Finished my ST 120 Build

    Post by Roy Mottram Sat Mar 16, 2013 9:36 pm

    it's in the manual but not as obvious as it should be, so I'm revising the manual to make it obvious even if you don't read the instructions,
    here is what it says in the old manual . . . .
    Filament Power
    Attach the filament power - connect the original filament wires (#4&5) to the outer tube and
    do the same on the other side with the filament wires (#15&16) to the other outer tube..
    You will also need to jumper the filament pins from V2 to V3 (pins 7 & 8 on the 6SN7 tubes).
    . . . but . . . the two filament jumpers actually go from V1 to V2
    baddog1946
    baddog1946


    Posts : 319
    Join date : 2010-02-03
    Location : Costa Rica

    Finished my ST 120 Build Empty Re: Finished my ST 120 Build

    Post by baddog1946 Sat Mar 16, 2013 11:06 pm

    Hi Bob:
    I hadn't really gone over the manual in detail because I don't have a spot for that board right now but this was very instructional for me and when I do I owe you one in advance thanks a lot. Good info as usual.

    BTW I was wondering why you don't make the holes for the triode/ultralinear mini switches a bit smaller so we don't have to use a washer there and it would also allow the switches to center in the holes.
    Geo
    Bob Latino
    Bob Latino
    Admin


    Posts : 3263
    Join date : 2008-11-26
    Location : Massachusetts

    Finished my ST 120 Build Empty Re: Finished my ST 120 Build

    Post by Bob Latino Sun Mar 17, 2013 8:35 am

    baddog1946 wrote:Hi Bob:
    I hadn't really gone over the manual in detail because I don't have a spot for that board right now but this was very instructional for me and when I do I owe you one in advance thanks a lot. Good info as usual.

    BTW I was wondering why you don't make the holes for the triode/ultralinear mini switches a bit smaller so we don't have to use a washer there and it would also allow the switches to center in the holes.
    Geo

    The reason the triode/pentode holes are not made smaller (1/4 inch) from their present size (3/8 inch) is that the original Dynaco ST-70 chassis had 3/8 inch holes for the bias pots. I want to keep the chassis available to those that now have an original ST-70 (with the original driver board) and may want to buy a new chassis from me.

    To answer a potential question that others may have > "Why don't you get 3/8 inch sized DPDT switches ?" > The answer is that no one (at least that I can find) makes a 3/8 inch sized toggle switch .. All the toggle swtiches that I have come across are either 1/4 inch or 1/2 inch switches.

    Bob
    baddog1946
    baddog1946


    Posts : 319
    Join date : 2010-02-03
    Location : Costa Rica

    Finished my ST 120 Build Empty Re: Finished my ST 120 Build

    Post by baddog1946 Sun Mar 17, 2013 9:21 am

    Good point.
    I found some plastic washers at the hobby shop that act as reducers from 3/8-1/4" and slide over the shaft of the switches and inside the hole that did the job nicely of locating them and I have the switches on one of my amps mounted without the washers. Looks a little tidier. The washers were super cheap. $.40 for 20 of them
    I originally tried to use the plastic washers that came with some input jacks. I sanded them slightly to fit and they worked fine when covered up by the nut but I found the others were a better fit without the sanding.
    Geo
    hawaii.ken
    hawaii.ken


    Posts : 157
    Join date : 2012-01-31

    Finished my ST 120 Build Empty Re: Finished my ST 120 Build

    Post by hawaii.ken Sun Mar 17, 2013 8:52 pm

    baddog1946 wrote:BTW I was wondering why you don't make the holes for the triode/ultralinear mini switches a bit smaller so we don't have to use a washer there and it would also allow the switches to center in the holes.
    Geo
    Thanks for pointing that out Shocked
    I didn't consider it when planning the upgrades for my MK-II's.

    Sponsored content


    Finished my ST 120 Build Empty Re: Finished my ST 120 Build

    Post by Sponsored content


      Current date/time is Sat May 11, 2024 4:05 pm