The Dynaco Tube Audio Forum

Would you like to react to this message? Create an account in a few clicks or log in to continue.
The Dynaco Tube Audio Forum

Dedicated to the restoration and preservation of all original Dynaco tube audio equipment - Customer support for Tubes4hifi VTA tube amp and preamp kits and all Dynakitparts.com products


+7
Luddite
zx
peterh
sKiZo
Cubdriver
Sal
corndog71
11 posters

    My VTA ST120

    corndog71
    corndog71


    Posts : 840
    Join date : 2013-03-19
    Location : It can get windy here

    My VTA ST120 Empty My VTA ST120

    Post by corndog71 Mon Feb 03, 2014 1:19 am

    My VTA ST120 IMG_8362_zpsfc7bbb41

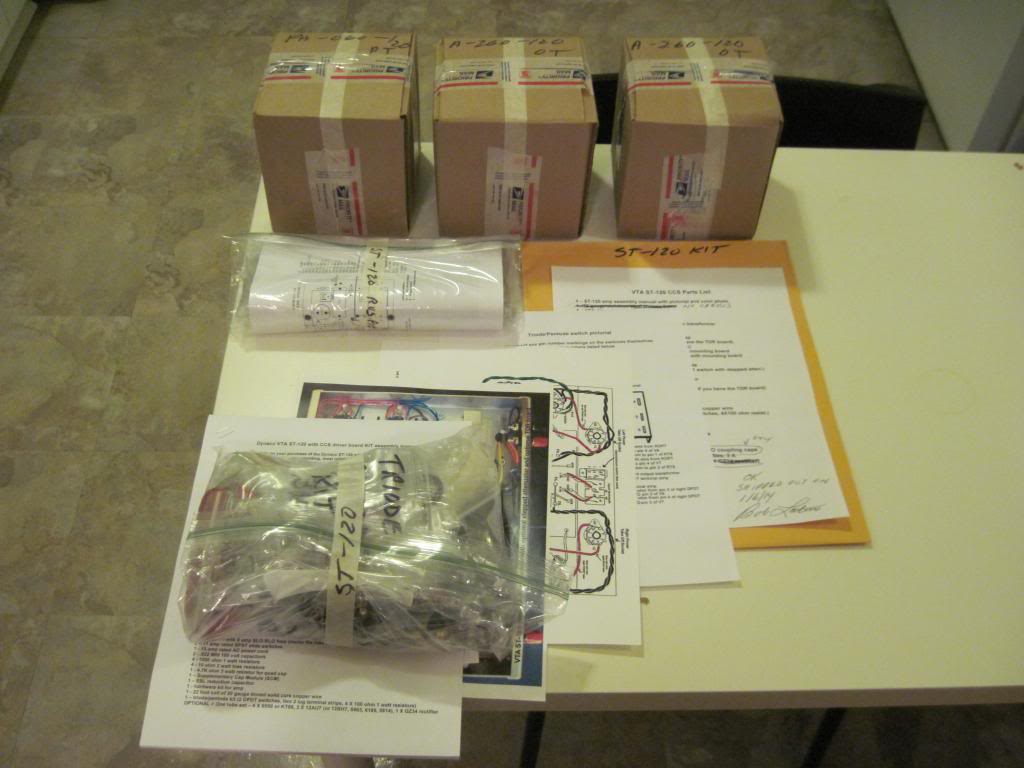
    I got my ST120 kit sans chassis because I wanted to build it a little differently.

    Ok, a LOT differently.

    Here's my sketch and inspiration.

    My VTA ST120 D479369D-9068-4915-AE6A-678F9B9BA8F3_zps7r18ivqq

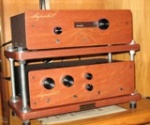
    The idea was to use a big 17"x17"x4" Hammond box.   I went with a similar layout as my modded ST35.

    My VTA ST120 IMG_8373_zps1246f6bf

    I wanted to forgo the big circuit board and go point to point wired as much as possible.

    Another feature is my use of Clarity Cap TC series 700V film power supply caps.  These are why I used such a big box.  drunken 

    My VTA ST120 IMG_8379_zpsdc346ff9

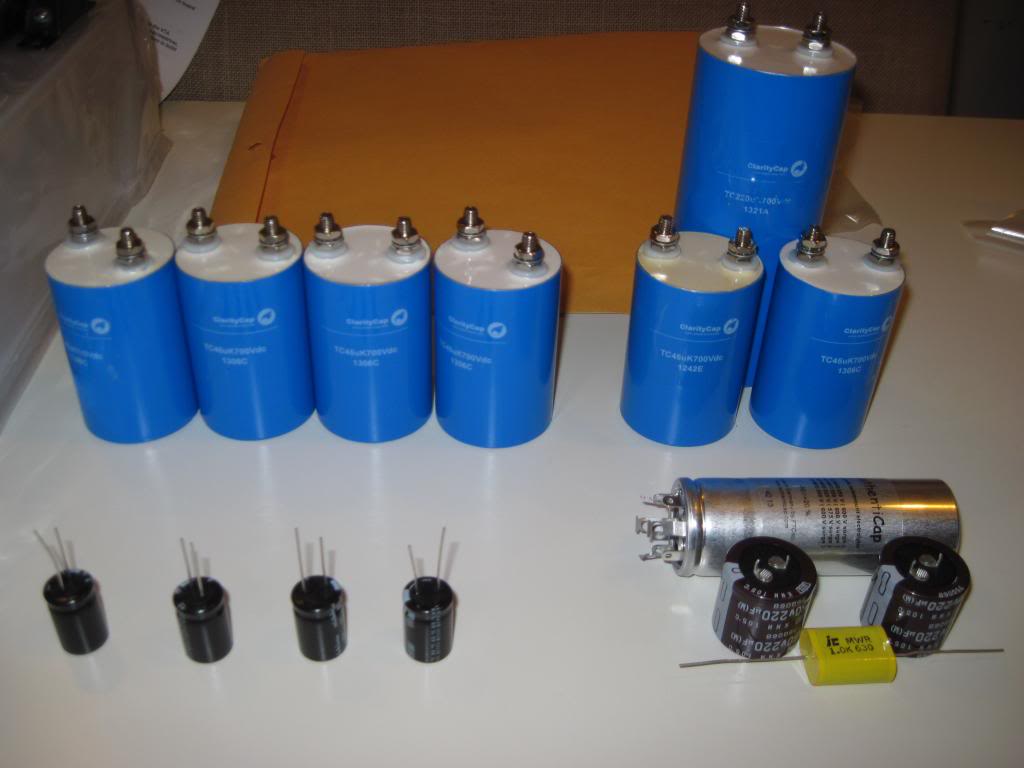
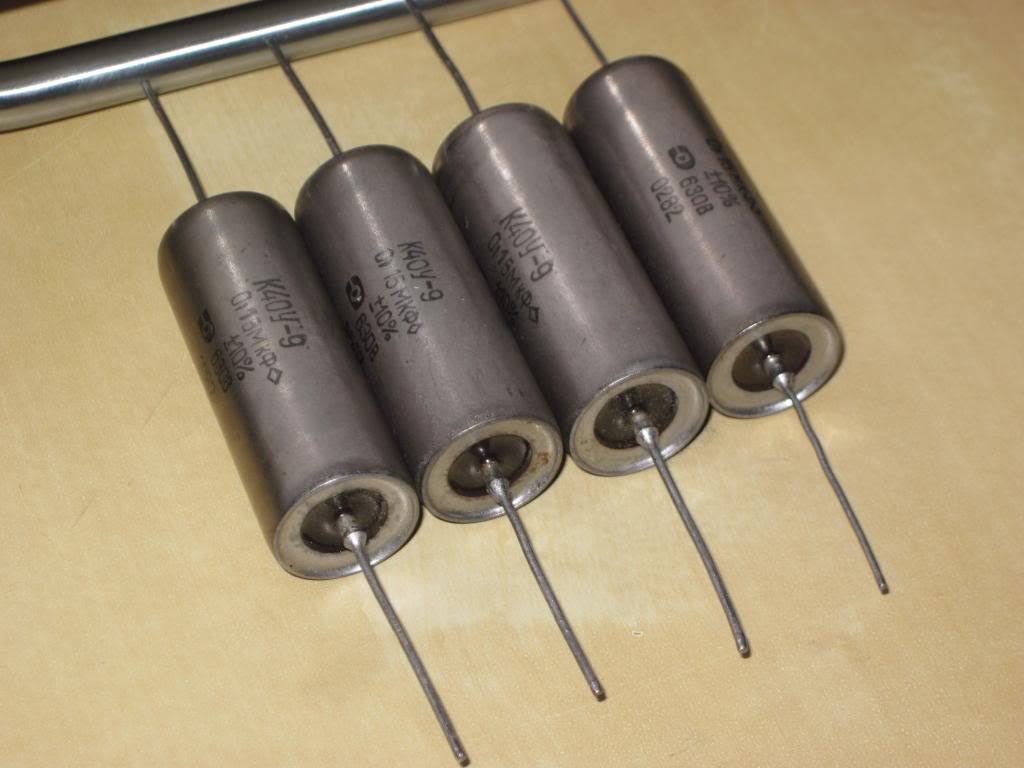
    I got the Russian PIO caps from Bob as well as a pair of Clarity Cap ESA caps for C1 & C2.

    My VTA ST120 IMG_8453_zpse4895657

    My VTA ST120 IMG_8383_zps835263a7

    My VTA ST120 IMG_8423_zps1c259b1a-1

    My VTA ST120 IMG_8438_zps7ba257c2

    The caps are held down with cable ties and industrial strength velcro. They don't budge.

    My VTA ST120 IMG_8462_zpse0e52262

    My VTA ST120 IMG_8480_zps24404161

    My VTA ST120 IMG_8477_zpse9eaf79a

    My VTA ST120 IMG_8515_zps322052ad

    My VTA ST120 IMG_8514_zps18e29525

    My VTA ST120 IMG_8516_zps108bfabe

    My VTA ST120 IMG_8500_zps08e6ca54

    My VTA ST120 IMG_8496_zps53ee9a49

    My VTA ST120 IMG_8492_zps4cafec5a

    I still have to do the main power connector, speaker connectors, input wires and a few ground wires.  I'm so close to being done I just had to share pics of my progress.

    More to come!
    Sal
    Sal


    Posts : 221
    Join date : 2009-02-05
    Location : Central New Jersey Dynaco-ST70.com

    My VTA ST120 Empty Re: My VTA ST120

    Post by Sal Mon Feb 03, 2014 4:19 pm

    Looking real nice. Great job!

    Sal
    Cubdriver
    Cubdriver


    Posts : 83
    Join date : 2014-01-21
    Age : 59
    Location : Southeastern Litchfield Co, CT

    My VTA ST120 Empty Re: My VTA ST120

    Post by Cubdriver Mon Feb 03, 2014 5:03 pm

    Looks good! Nice fab work on the chassis!

    -Pat
    sKiZo
    sKiZo


    Posts : 1530
    Join date : 2013-04-01
    Location : Michigan USA

    My VTA ST120 Empty Re: My VTA ST120

    Post by sKiZo Mon Feb 03, 2014 5:08 pm

    Looks like you're getting close to first fire. Fire! Fire! FIRE!

    Not fair though ... my sketch didn't look anything like what finally happened ...  pirat 

    Looks to be faithful to the original circuit. Fascinating tracking the point to point replacements for the VTA board. Seems to me this isn't your first ST120? Should be interesting to see how it goes up head to head with the original components.

    How close did you stick to the original cap values?

    How many hours into planning, and how many into doing so far?

    My VTA ST120 Popcorn
    corndog71
    corndog71


    Posts : 840
    Join date : 2013-03-19
    Location : It can get windy here

    My VTA ST120 Empty Re: My VTA ST120

    Post by corndog71 Mon Feb 03, 2014 9:18 pm

    sKiZo wrote:Looks like you're getting close to first fire. Fire! Fire! FIRE!

    Not fair though ... my sketch didn't look anything like what finally happened ...  pirat 

    Looks to be faithful to the original circuit. Fascinating tracking the point to point replacements for the VTA board. Seems to me this isn't your first ST120? Should be interesting to see how it goes up head to head with the original components.

    How close did you stick to the original cap values?

    How many hours into planning, and how many into doing so far?


    Actually this is my first ST120.  I have in the past built a pair of Mk4s, an ST70, and several Bottlehead kits.  My most ambitious project was sandwiching three different ST35 mods into one.  The ST35 was the real learning experience for me because I built it in a unique way and it sounded way better than I expected.  It was then that I started learning more about tube amp design and understanding what does what in each circuit.  I took cues and ideas from several places.  And then a couple of parts failed and I recognized where I strayed off the path.  So I rebuilt it.  It still sounds fantastic!  And I'm still learning.

    The main supply caps are 45uF, 220uF, and 45uF. The four driver caps are also 45uF.

    I studied the ST120 on and off for months.  I drew out several layouts last summer when I decided I was going to get one.  Just had to wait for the money.  I put in probably 14 hours this past weekend doing the bulk of the work.  I still need a tool to finish the power connector.
    corndog71
    corndog71


    Posts : 840
    Join date : 2013-03-19
    Location : It can get windy here

    My VTA ST120 Empty Re: My VTA ST120

    Post by corndog71 Tue Feb 18, 2014 12:51 pm

    I finally got around to wiring up the inputs and outputs. The speaker connectors I decided to go with are a fairly new design by Electra Cable. http://electracable.com/tubeconnector.htm They're designed for speaker cabinets so it was a bit tricky finding a way to secure them. I ended up using a pvc elbow which I cut the ends off as they slipped over the tube connectors tightly. I could glue them to make them permanent but they're pretty secure as is. Input wire is Kimber TCSS.

    My VTA ST120 IMG_8528_zps27e5d10f

    My VTA ST120 IMG_8527_zps50d79f39

    My VTA ST120 IMG_8525_zpsc6030b5c

    My VTA ST120 IMG_8529_zpsdb13d5cf

    I still have to get a hole punch for my power connector and then order the tubes. I'm hoping to get it fired up in the next week or two.  bounce 
    sKiZo
    sKiZo


    Posts : 1530
    Join date : 2013-04-01
    Location : Michigan USA

    My VTA ST120 Empty Re: My VTA ST120

    Post by sKiZo Tue Feb 18, 2014 4:41 pm

    Fire in the hole! Press to MECO! PRESS TO MECO!!

    One observation ... your through holes in the chassis look a bit rough ... any sharp edges?

    Twere me, I'd get me some split grommets as insurance against shorts. Another good option is some split loom cover like they sell in the auto parts - cut a short section and just slide it down ...

    Interesting speaker connectors ... surprised they don't offer a washer clip to hold them in place. Wonder if you could just etch a groove in the casing with a dremel and add a spring type "C" clip to hold them in ... put a little bend in the clip to tighten out any slop.

    My VTA ST120 P_301000241_1

    Or for that matter a hose clamp ... Or just hot glue the lil rascals.
    corndog71
    corndog71


    Posts : 840
    Join date : 2013-03-19
    Location : It can get windy here

    My VTA ST120 Empty Re: My VTA ST120

    Post by corndog71 Tue Feb 18, 2014 5:48 pm

    sKiZo wrote:Fire in the hole! Press to MECO! PRESS TO MECO!!

    One observation ... your through holes in the chassis look a bit rough ... any sharp edges?

    Twere me, I'd get me some split grommets as insurance against shorts. Another good option is some split loom cover like they sell in the auto parts - cut a short section and just slide it down ...

    Interesting speaker connectors ... surprised they don't offer a washer clip to hold them in place. Wonder if you could just etch a groove in the casing with a dremel and add a spring type "C" clip to hold them in ... put a little bend in the clip to tighten out any slop.

    My VTA ST120 P_301000241_1

    Or for that matter a hose clamp ... Or just hot glue the lil rascals.

    I really need a new camera.  I made sure to deburr all of the tranny holes.  I considered using grommets but I think they'll be ok.  I imagine that if anything caused those wires to get cut by the chassis then I'd have bigger problems.  

    I was excited to use the tube connectors until I got them and tried mounting them.  They really were not meant for sheet metal.  I considered hose clamps, hot glue, silicone, all of the above!  I went to the hardware store for inspiration and found the pvc elbow in the plumbing dept.  It had a really nice, tight fit.  Of course when I got home and tried pushing it onto the connector  I ran into a bit of a leverage problem.  As in I had none.  They were a little too tight with the space I was working with.  I was ready to give up and try something else until I got the idea to make a relief cut along the length turning it into one big c-clamp.  That worked much better.  I plugged and unplugged the banana plug and it seemed to hold pretty well so for now it'll do.  I just ordered the hole punch I needed and should get it on Thursday!  She'll be done until I can get some tubes.  I'm waiting on a pending sale to go through before I get them.
    peterh
    peterh


    Posts : 1833
    Join date : 2012-12-25
    Location : gothenburg, sweden

    My VTA ST120 Empty Re: My VTA ST120

    Post by peterh Wed Feb 19, 2014 1:16 am

    corndog71 wrote:
    sKiZo wrote:Fire in the hole! Press to MECO! PRESS TO MECO!!

    One observation ... your through holes in the chassis look a bit rough ... any sharp edges?

    Twere me, I'd get me some split grommets as insurance against shorts. Another good option is some split loom cover like they sell in the auto parts - cut a short section and just slide it down ...

    Interesting speaker connectors ... surprised they don't offer a washer clip to hold them in place. Wonder if you could just etch a groove in the casing with a dremel and add a spring type "C" clip to hold them in ... put a little bend in the clip to tighten out any slop.

    My VTA ST120 P_301000241_1

    Or for that matter a hose clamp ... Or just hot glue the lil rascals.

    I really need a new camera.  I made sure to deburr all of the tranny holes.  I considered using grommets but I think they'll be ok.  I imagine that if anything caused those wires to get cut by the chassis then I'd have bigger problems.  

    I was excited to use the tube connectors until I got them and tried mounting them.  They really were not meant for sheet metal.  I considered hose clamps, hot glue, silicone, all of the above!  I went to the hardware store for inspiration and found the pvc elbow in the plumbing dept.  It had a really nice, tight fit.  Of course when I got home and tried pushing it onto the connector  I ran into a bit of a leverage problem.  As in I had none.  They were a little too tight with the space I was working with.  I was ready to give up and try something else until I got the idea to make a relief cut along the length turning it into one big c-clamp.  That worked much better.  I plugged and unplugged the banana plug and it seemed to hold pretty well so for now it'll do.  I just ordered the hole punch I needed and should get it on Thursday!  She'll be done until I can get some tubes.  I'm waiting on a pending sale to go through before I get them.
    The holes are missing a rubber "bushing" ( or what you call them).
    Leaving wires passing a hole in metal without protection is a disaster to be waiting for, power tranny wires might very well be vibrating slightly, this will eat through the isolation as time passes.
    corndog71
    corndog71


    Posts : 840
    Join date : 2013-03-19
    Location : It can get windy here

    My VTA ST120 Empty Re: My VTA ST120

    Post by corndog71 Wed Feb 19, 2014 1:26 pm

    peterh wrote:
    The holes are missing a rubber "bushing" ( or what you call them).  
    Leaving wires passing a hole in metal without protection is a disaster to be waiting for, power tranny wires might very well be vibrating slightly, this will eat through the isolation as time passes.

    These are the output transformers. I'm pretty sure even the original chassis doesn't use grommets there. As I said, I took off any sharp edges so I'm pretty sure they're ok.
    peterh
    peterh


    Posts : 1833
    Join date : 2012-12-25
    Location : gothenburg, sweden

    My VTA ST120 Empty Re: My VTA ST120

    Post by peterh Wed Feb 19, 2014 2:47 pm

    corndog71 wrote:
    peterh wrote:
    The holes are missing a rubber "bushing" ( or what you call them).  
    Leaving wires passing a hole in metal without protection is a disaster to be waiting for, power tranny wires might very well be vibrating slightly, this will eat through the isolation as time passes.

    These are the output transformers.  I'm pretty sure even the original chassis doesn't use grommets there.  As I said, I took off any sharp edges so I'm pretty sure they're ok.
    Well, it's Your transformers.
    Isolating will cost close to zero. A cable that get the isolation scrubbed through might cost a lot. A split plastic tube will do here.
    avatar
    zx


    Posts : 205
    Join date : 2011-08-05

    My VTA ST120 Empty Re: My VTA ST120

    Post by zx Wed Feb 19, 2014 4:20 pm

    My 50 year old pr MK3s.....Has grommets ....One for the Power tranX...one for the output tranx on ea Amp....
    An my 40 year old pr MK3s dont have any....If it were my new Amp...I would get grommets ......
    Have fun with tubes...........


    Thanks for the site Bob............
    Luddite
    Luddite


    Posts : 233
    Join date : 2009-02-04
    Age : 73
    Location : Texas

    My VTA ST120 Empty Re: My VTA ST120

    Post by Luddite Thu Feb 20, 2014 1:25 pm

    zx wrote:My 50 year old pr MK3s.....Has grommets ....One for the Power tranX...one for the output tranx on ea Amp....
    An my 40 year old pr MK3s dont have any....If it were my new Amp...I would get grommets ......
    Have fun with tubes...........

    Thanks for the site Bob............


    Here's a bushing that might work...  http://www.alliance-express.com/nylon-snap-in-bushings

    Best Regards,
    Charlie
    sKiZo
    sKiZo


    Posts : 1530
    Join date : 2013-04-01
    Location : Michigan USA

    My VTA ST120 Empty Re: My VTA ST120

    Post by sKiZo Thu Feb 20, 2014 4:23 pm

    corndog71 wrote:These are the output transformers.  I'm pretty sure even the original chassis doesn't use grommets there.  As I said, I took off any sharp edges so I'm pretty sure they're ok.

    We're just not gonna get off your case till you pretty up them holes, dude!  And it better be an "audiophile grade" fix!!   clown

    Luddite wrote:
    Here's a bushing that might work...  http://www.alliance-express.com/nylon-snap-in-bushings

    My VTA ST120 60640_BSOC_P_1_L

    Yup ... those work real slick. If in doubt as to size, go one up and clip them as needed. You also might need to razor the tabs down a bit so they lock in if you're using thicker metal ...
    corndog71
    corndog71


    Posts : 840
    Join date : 2013-03-19
    Location : It can get windy here

    My VTA ST120 Empty Re: My VTA ST120

    Post by corndog71 Thu Feb 20, 2014 4:39 pm

    I appreciate all of the concern for my transformers.  cyclops 
    corndog71
    corndog71


    Posts : 840
    Join date : 2013-03-19
    Location : It can get windy here

    My VTA ST120 Empty Re: My VTA ST120

    Post by corndog71 Tue Feb 25, 2014 11:26 pm

    OK, she's done!

    I installed the Neutrik PowerCon which I admit is unusual but I love the solid connection I get from it.

    I also added some split tubing around the transformer wires to give them some added protection.

    My VTA ST120 IMG_8558_zps70ce8862

    My VTA ST120 IMG_8560_zpsa0e5a73f

    And before anyone gives me crap for my connector choices I'll just say I have no intention of selling this baby.  She's all mine!

    Tubes are en route so I hope to get her fired up this weekend!  I got the 12BH7s from Ram Labs and a quad of Tung Sol 6550s from Upscale Audio to start. Eventually I'll pick up some KT88s and KT120s.

     bounce bounce bounce bounce bounce bounce  bounce bounce bounce bounce bounce bounce 
    Maintarget
    Maintarget


    Posts : 227
    Join date : 2013-02-10

    My VTA ST120 Empty Re: My VTA ST120

    Post by Maintarget Tue Feb 25, 2014 11:33 pm

    Really like the looks nice JOB!
    arledgsc
    arledgsc


    Posts : 496
    Join date : 2012-11-30
    Age : 70
    Location : Santa Rosa CA

    My VTA ST120 Empty Re: My VTA ST120

    Post by arledgsc Wed Feb 26, 2014 9:35 am

    Gulp!   afro   Be sure and bleed those caps before working on the amp..

    Nice amp.  All this amp building creativity is giving me the itch to build a KT150 amp.
    corndog71
    corndog71


    Posts : 840
    Join date : 2013-03-19
    Location : It can get windy here

    My VTA ST120 Empty Re: My VTA ST120

    Post by corndog71 Wed Feb 26, 2014 11:18 am

    arledgsc wrote:Gulp!   afro   Be sure and bleed those caps before working on the amp..

    Nice amp.  All this amp building creativity is giving me the itch to build a KT150 amp.

    If you can find suitable transformers let me know. Sounds like fun!
    deepee99
    deepee99


    Posts : 2244
    Join date : 2012-05-23
    Location : Wallace, Idaho

    My VTA ST120 Empty Showboats!!!

    Post by deepee99 Wed Feb 26, 2014 12:29 pm

    You guys should start your own website. I'm still holding stuff together with duct tape, don't need to be constantly depressed by the excursions of geniuses.
    What's a watt, after all?
    sKiZo
    sKiZo


    Posts : 1530
    Join date : 2013-04-01
    Location : Michigan USA

    My VTA ST120 Empty Re: My VTA ST120

    Post by sKiZo Wed Feb 26, 2014 3:31 pm

    Looks good, but doncha think the insulators on the thru holes is a bit overkill?

    BIFF!!
    (OWWWWWW!!)

    Thanx ... I needed that ...  geek

    Interesting choice of tubes though ... can't wait to hear your impressions after they have a chance to break in a bit.
    corndog71
    corndog71


    Posts : 840
    Join date : 2013-03-19
    Location : It can get windy here

    My VTA ST120 Empty Re: My VTA ST120

    Post by corndog71 Fri Feb 28, 2014 11:42 pm

    arledgsc wrote:Gulp!   afro   Be sure and bleed those caps before working on the amp..

    Funny you mention that.  During my troublehooting I noticed that these giant film caps already bleed down pretty quickly.  Around 10 minutes after shutting it down I measured just over 4 volts on each of the main supply caps.  Cool 

    I ran into a few hiccups.  

    The AC in my apartment is 125V.  I had a feeling this was going to be too high for my ST120 and it was.

    Fortunately, I got a variac.  Finally!  I've actually been meaning to get one of these for years.  It was never a priority until now.  Wink 

    I also caught one last mistake in my driver wiring.  Here it is fixed.

    My VTA ST120 IMG_8564_zpsadc16dc8

    After going over my connections again and convinced I had it right I fired it up with the inputs shorted and got some significant hum.  Bias was set and seemed stable but that hum confounded me.  And then I took a chance and connected the chassis to ground.

    Silence.

    My VTA ST120 IMG_8565_zpsfc4202af

    Fixed!

    My VTA ST120 IMG_8573_zps9aa1d427

    I haven't gotten the RAM tubes yet so I dug through my stash and plugged in an EH 12AU7 in the middle and a pair of RCA cleartop 12AU7s in the other slots.  So far so good.  Been letting it play for a few hours now.

    My VTA ST120 IMG_8572_zpsdfa8ab66

    My VTA ST120 IMG_8569_zps9ea4c40d


    Last edited by corndog71 on Tue Mar 04, 2014 12:02 am; edited 3 times in total
    sKiZo
    sKiZo


    Posts : 1530
    Join date : 2013-04-01
    Location : Michigan USA

    My VTA ST120 Empty Re: My VTA ST120

    Post by sKiZo Sat Mar 01, 2014 3:55 am

    That last check is always a good way to shake out some potential problems. It's not a mistake until you leave it that way, right?

    First fire is always a magic moment ... good to see you got er going ...

    Also good to see you're dealing with the power situation. I just checked mine, and wall current is 125.5 with 117.8 coming out of the bucking transformer ... I feel a whole lot better having that lil guy taking point for the amp ...

    corndog71
    corndog71


    Posts : 840
    Join date : 2013-03-19
    Location : It can get windy here

    My VTA ST120 Empty Re: My VTA ST120

    Post by corndog71 Mon Mar 03, 2014 1:14 am

    I love it! The ST120 sounds fantastic. Fast and articulate but with just a hint of warmth that within moments lets you know everything is going to be ok. And with the right music she can really swing!

    Highly recommended!
    sKiZo
    sKiZo


    Posts : 1530
    Join date : 2013-04-01
    Location : Michigan USA

    My VTA ST120 Empty Re: My VTA ST120

    Post by sKiZo Mon Mar 03, 2014 1:19 am

    Adds whole new layers, don't it?

    ... and it'll only get better as it breaks in. Couple hundred hours before they really start to sing as all the little fiddlybits start to harmonize ...

    Congrats on a beautiful piece ... Fun part is when someone asks where they can get one just like yours, and the answer is "You can't ... you just can't ... "  Cool

    Sponsored content


    My VTA ST120 Empty Re: My VTA ST120

    Post by Sponsored content


      Current date/time is Fri Apr 26, 2024 10:01 pm