The Dynaco Tube Audio Forum

Would you like to react to this message? Create an account in a few clicks or log in to continue.
The Dynaco Tube Audio Forum

Dedicated to the restoration and preservation of all original Dynaco tube audio equipment - Customer support for Tubes4hifi VTA tube amp and preamp kits and all Dynakitparts.com products


3 posters

    M125 build

    avatar
    Brandon3212276


    Posts : 6
    Join date : 2021-08-13

    M125 build Empty M125 build

    Post by Brandon3212276 Fri Aug 27, 2021 10:01 am

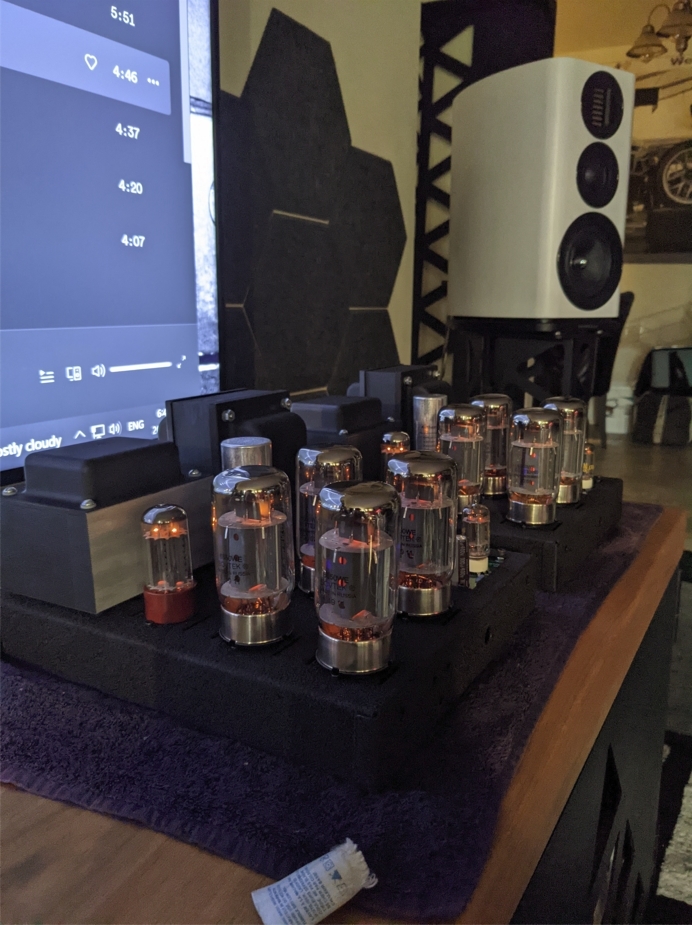
    So here are some pics of the M125 monoblocks I’ve been building over the last few weeks.  This is the first time I’ve built something like this, it was actually a lot more fun than I expected and has inspired me to make a matching pre-amp to go with the power amps.  Both amps fired up basically first shot with no issues and sound unbelievable ! I have a Schiit Audio class A amp but these are noticeably better ! The sound stage they create is pretty wild.  

    M125 build 62d6691acbff98dc19f81c0ef1bc6ac8

    M125 build 2b2ddb1626590fa4e65b1c83031d75f8

    Black & white ebony faceplates
    M125 build Ceefe68b5fad0666f1878830247f2c72

    M125 build F4b852ac830f24800b31576a92df31ad

    M125 build E22a964f8dd5028ce14cbb14a429d868

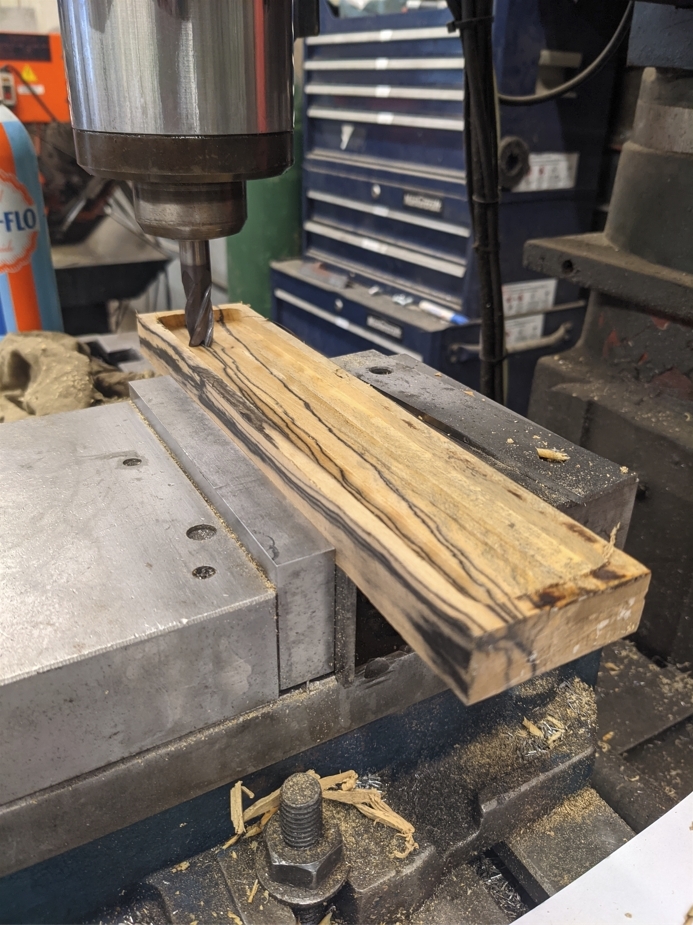
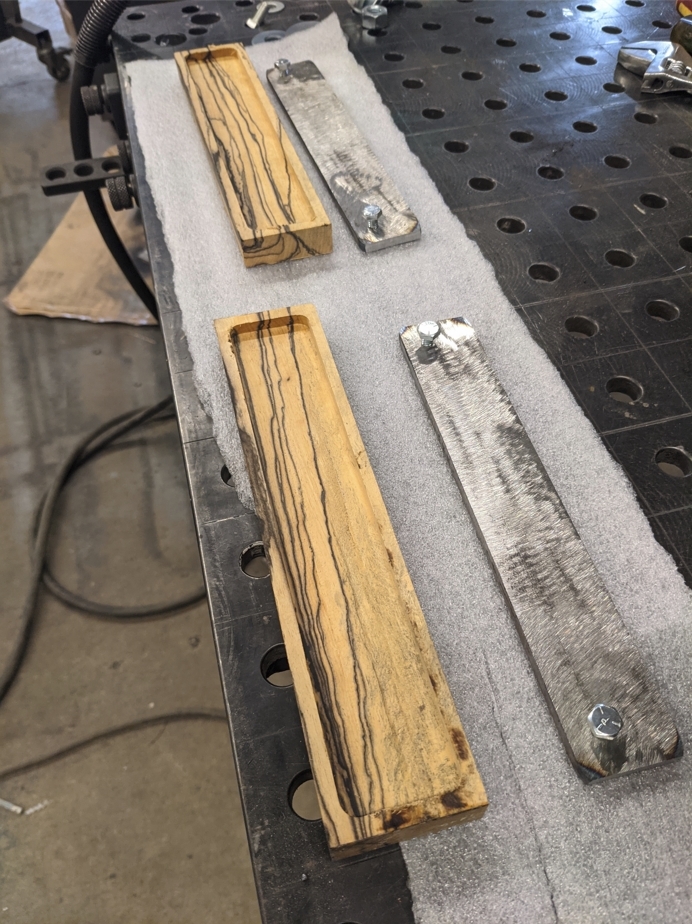
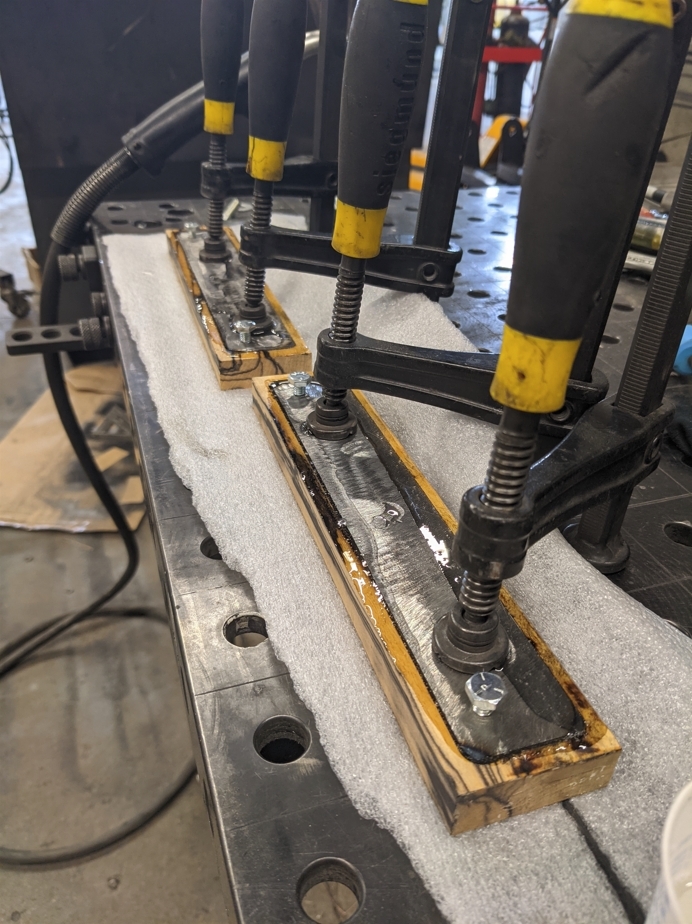
    1/4" thick steel inserts were epoxied into the back of the wood faces to prevent any future warping and to make mounting easy
    M125 build 4dd2a3ed8a0b1dd1168dbb0c4b3a70c8

    M125 build 35e58149df50bf1b80904ef639d9fa69

    M125 build 510324cd313de705e5caef83b0673e5f

    M125 build 4630087cc67f5e4bc58a99de9075e5c0

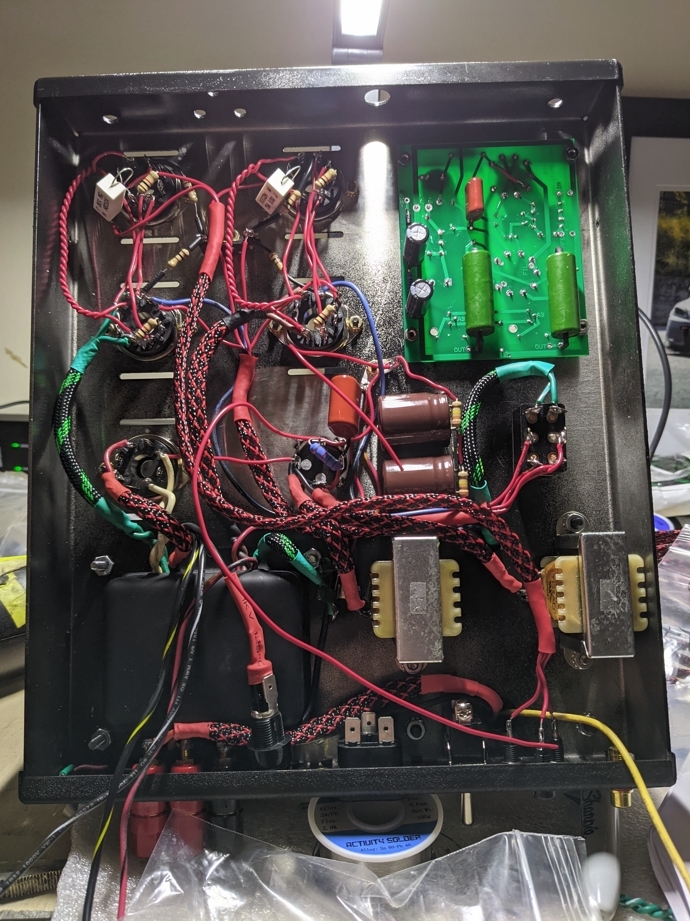
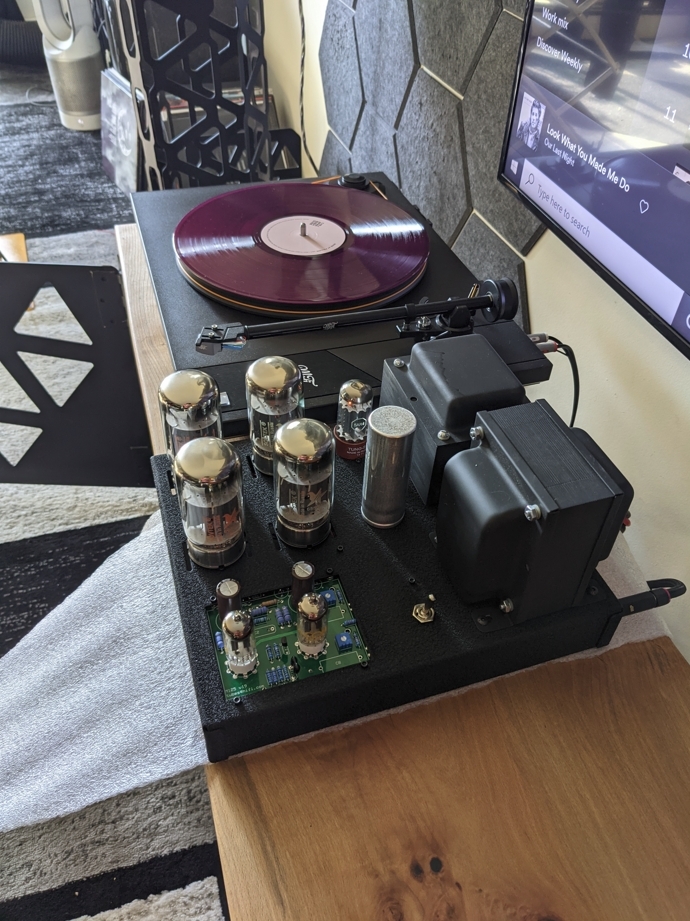
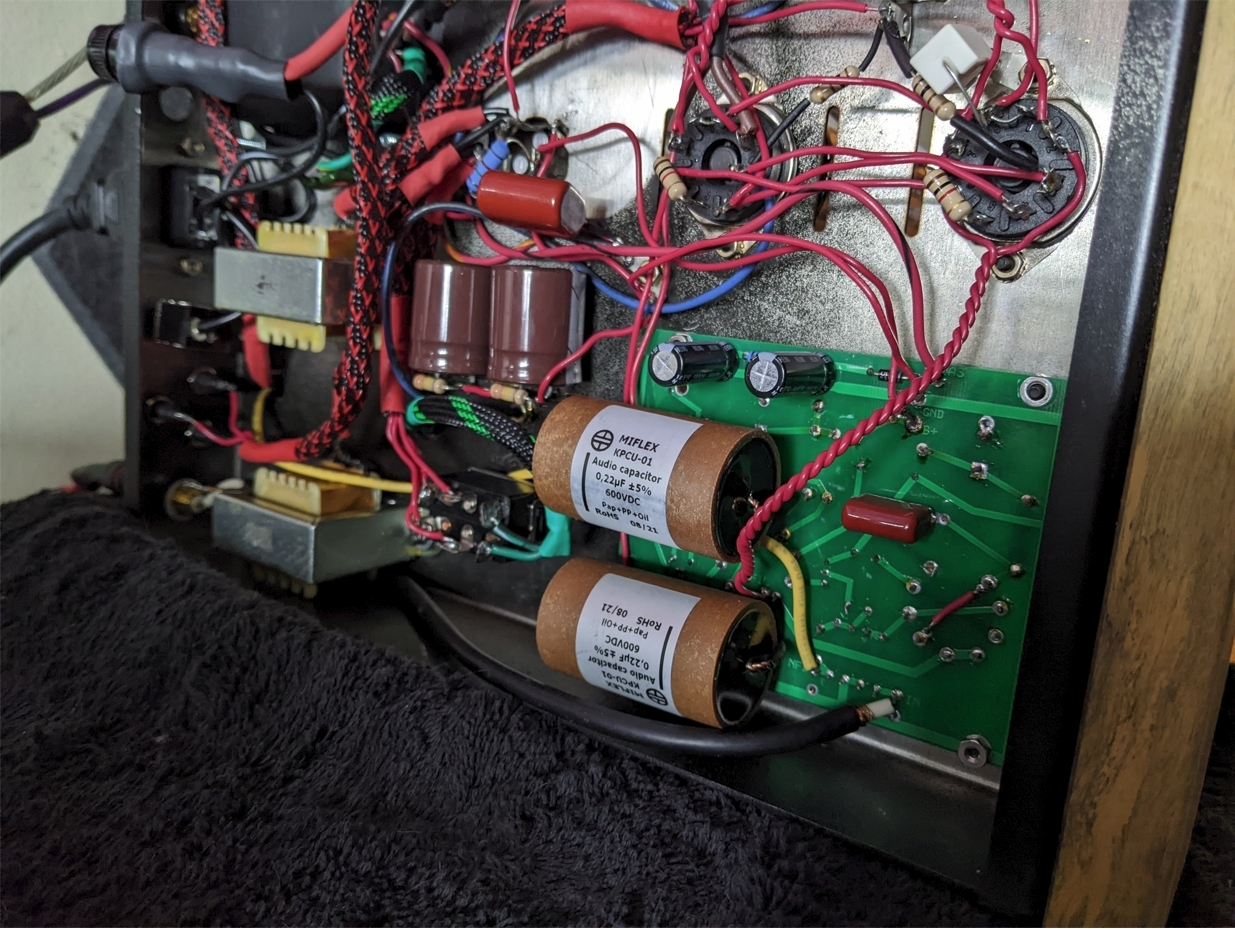
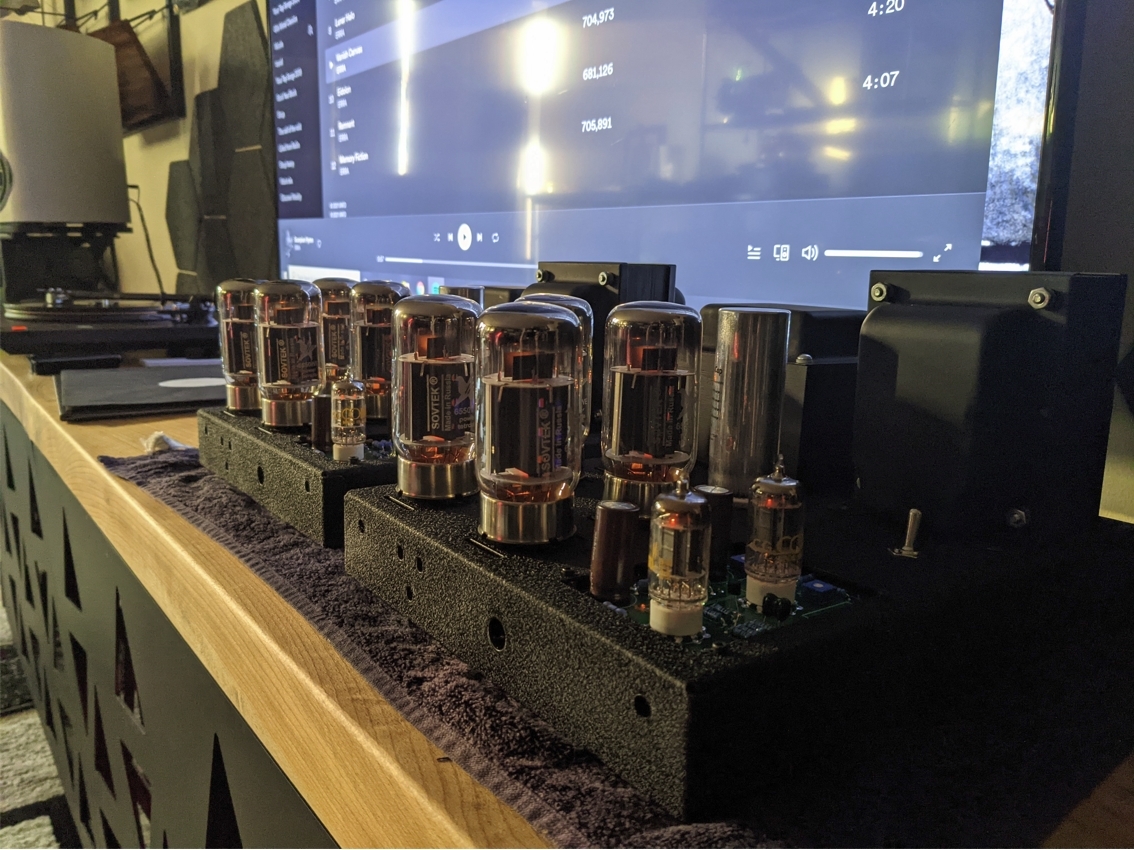
    Some initial testing and burn in
    M125 build Bb726f97cca12de16e23dae426f35539
    M125 build Aa4becc1b6f7e5897ea99860579736e3

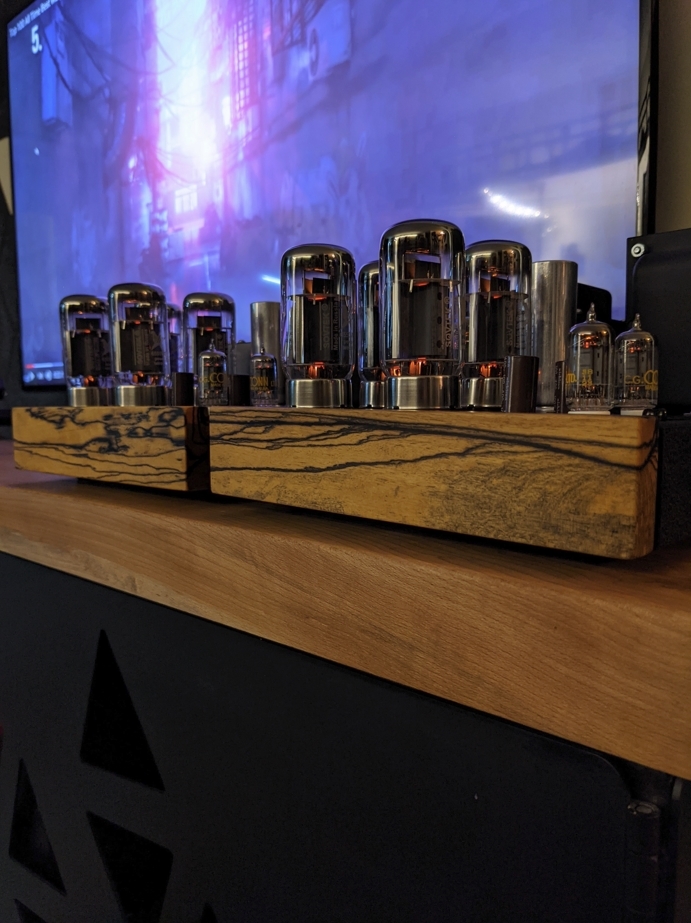
    Wood faces mounted up, I'll do some engraving on the faces in time to dress them up some more.  I polished and waxed the wood faces to a pretty good shine, unfortunately the pics were taken at night so they're a little dark.  I'll get more this weekend.
    M125 build 4e5c1d871767457c2289d2bb8215ef25
    M125 build 7113cdb8f1321989a7e955de7de4696e

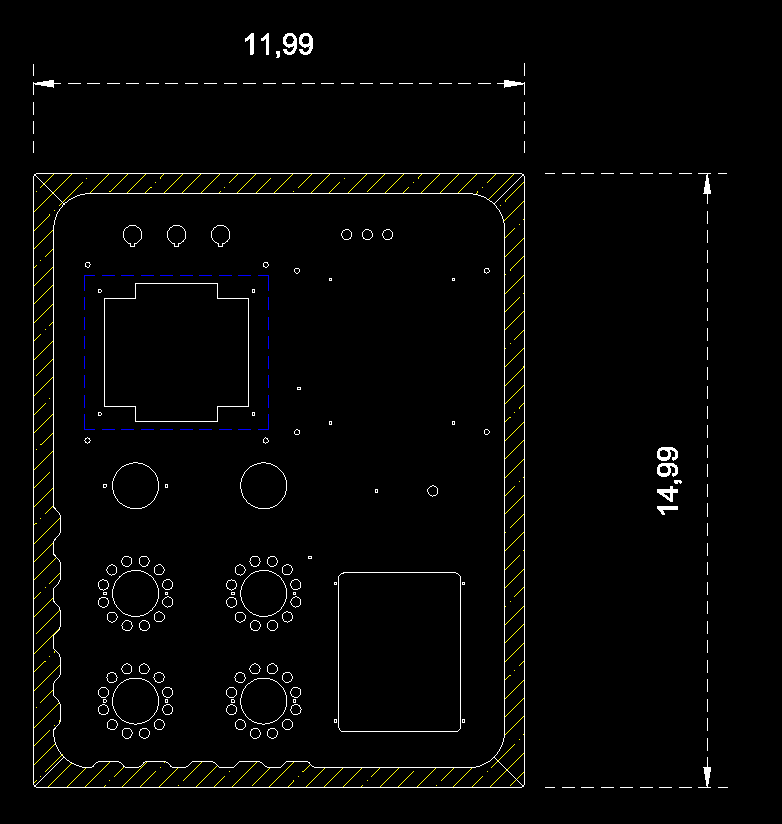
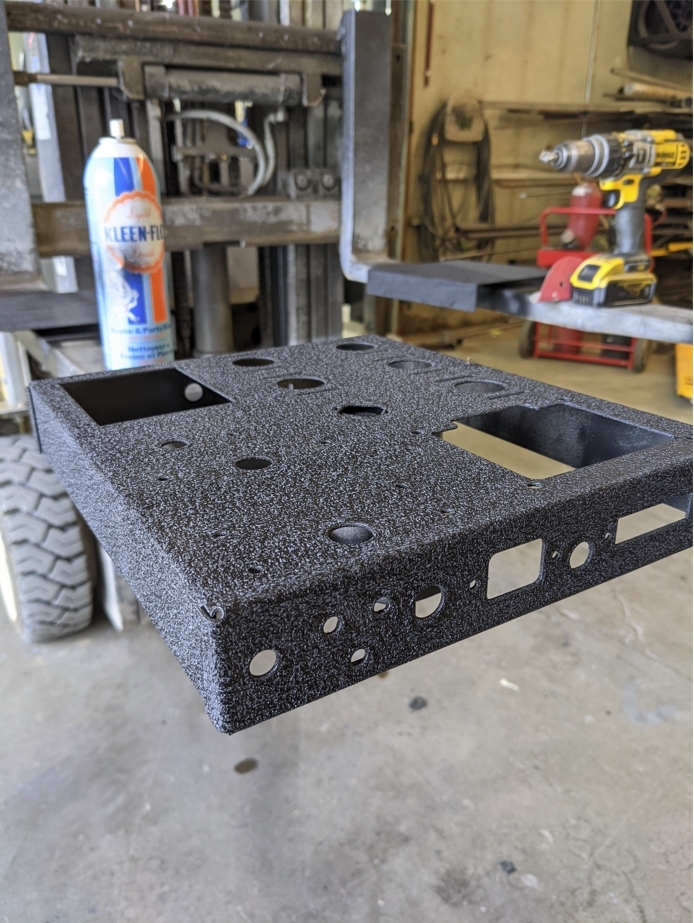
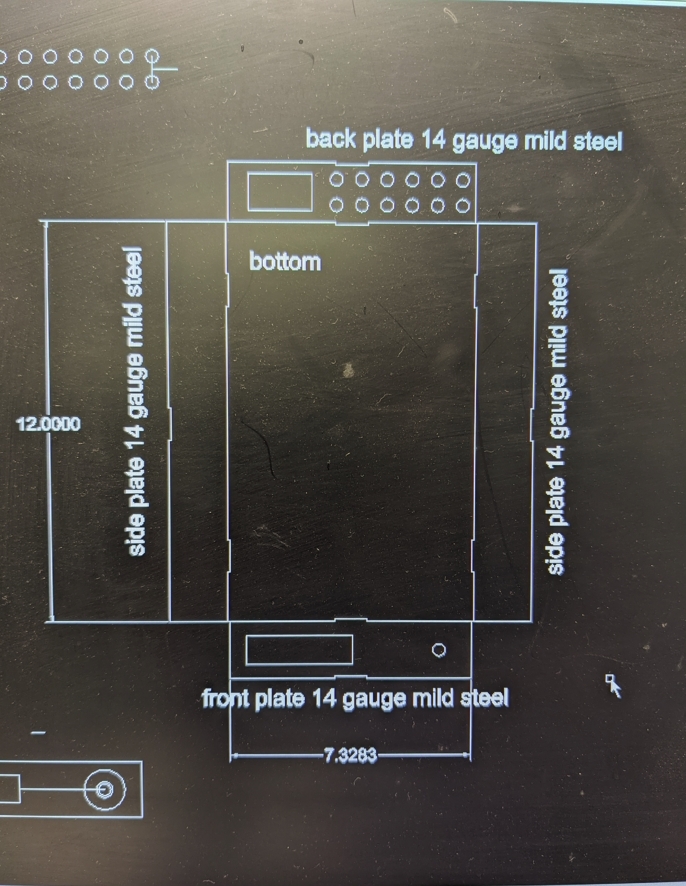
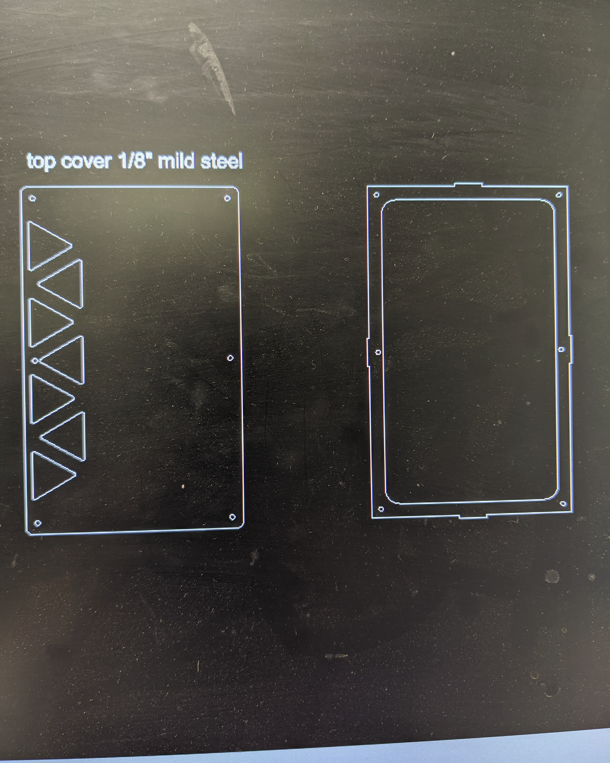
    Here are a few rough pics of the laser cut pre-amp chassis, more details on that another time.
    M125 build Df581e413345a17a89aed4622a3c0ab5
    M125 build 8668015189865018927e095ed189eae0

    Bob Latino, Dave_in_Va, daryl944, New2Tubez and Rec like this post

    AmpedUp
    AmpedUp


    Posts : 36
    Join date : 2019-10-26
    Location : Kansas City

    M125 build Empty Re: M125 build

    Post by AmpedUp Sun Aug 29, 2021 11:54 pm

    Yet another twist and new look on a pair of M-125s. Beautiful... Enjoy the music. It looks like you have quite the CNC machine with all the cut metal in the background.

    Mike...
    avatar
    kFish


    Posts : 6
    Join date : 2019-02-17

    M125 build Empty Re: M125 build

    Post by kFish Sun Sep 12, 2021 10:01 am

    Beautiful. I do want to hear more about the chassis and the process used. It gives a great amp a very unique look.

    Brandon3212276 likes this post

    avatar
    Guest
    Guest


    M125 build Empty Re: M125 build

    Post by Guest Sun Sep 12, 2021 11:38 am

    Those look awesome. Makes me almost want to run in an 8 tube configuration. I've been running two tubes in each amp for the last 5+ years. With Cornwalls that is all I need.

    They sure look cool with all 8. That little rectifier tube has its work cut out - I went down to two tubes per amp to protect my precious rectifier tubes - that and the new bias adjustments which came down - in the old days of 1.2 for 4 tubes and 600 for two tubes really eat tubes - now with 1.0 and 500 - much more stable - I've been running the same tubes for years.

    Which Sovteks are those?
    avatar
    Brandon3212276


    Posts : 6
    Join date : 2021-08-13

    M125 build Empty Re: M125 build

    Post by Brandon3212276 Sun Sep 12, 2021 2:54 pm

    kFish wrote:Beautiful.  I do want to hear more about the chassis and the process used.  It gives a great amp a very unique look.

    For the chassis I just relocated all the switches and stuff to the rear of the amp, also used black oxide hardware to keep the dark theme going. Paint is just wrinkle black out of a spray can, if you follow the directions you'll get great results.

    avatar
    Brandon3212276


    Posts : 6
    Join date : 2021-08-13

    M125 build Empty Re: M125 build

    Post by Brandon3212276 Sun Sep 12, 2021 2:57 pm

    costerdock wrote:Those look awesome.  Makes me almost want to run in an 8 tube configuration.  I've been running two tubes in each amp for the last 5+ years.   With Cornwalls that is all I need.

    They sure look cool with all 8.   That little rectifier tube has its work cut out - I went down to two tubes per amp to protect my precious rectifier tubes - that and the new bias adjustments which came down - in the old days of 1.2 for 4 tubes and 600 for two tubes really eat tubes - now with 1.0 and 500 - much more stable - I've been running the same tubes for years.

    Which Sovteks are those?

    Yeah I went with 8 tube configuration to drive my Evo 4.2s, I gotta say it really is good, even better than my Schiit Class A amp.


    These are 6550WE's.
    avatar
    kFish


    Posts : 6
    Join date : 2019-02-17

    M125 build Empty Re: M125 build

    Post by kFish Sun Sep 12, 2021 5:31 pm

    Brandon3212276 wrote:
    For the chassis I just relocated all the switches and stuff to the rear of the amp, also used black oxide hardware to keep the dark theme going.  Paint is just wrinkle black out of a spray can, if you follow the directions you'll get great results.  

    Wow, I never would have thought to use that kind of paint on the chassis. I thought it was some crazy chemical process. I will steal your idea for some future project (if I can ever find time for future projects...).
    avatar
    Brandon3212276


    Posts : 6
    Join date : 2021-08-13

    M125 build Empty Re: M125 build

    Post by Brandon3212276 Tue Dec 14, 2021 2:46 pm

    So now that I have some hours on these amps I've REALLY grown to like them, I actually enjoy them more than my Musical Fidelity KW750 that retailed for something wild like 10K.  I felt that these were deserving of a bit of a face lift so they look a little less DIY.  I am also going to see where I can upgrade any existing components to maybe bring them to the next level.

    I have designed a new pair of chassis and transformer covers from scratch, the chassis will be wrapped in solid birds eye maple.  I'm going to paint the chassis a dark battleship grey and have the wood dyed a transparent jet black.

    [url=Image from Gyazo[/url]

    kFish likes this post

    avatar
    Brandon3212276


    Posts : 6
    Join date : 2021-08-13

    M125 build Empty Re: M125 build

    Post by Brandon3212276 Fri Dec 17, 2021 12:07 pm

    Cap upgrades came in last night for the power supply and coupling caps.  Should hopefully get them installed this weekend.

    M125 build 4bce890b97a987214deee6b54bcba77e

    Copper foil Miflex caps
    M125 build 8cc7a6919084894acca1beafa78c0b44
    avatar
    Brandon3212276


    Posts : 6
    Join date : 2021-08-13

    M125 build Empty Re: M125 build

    Post by Brandon3212276 Mon Dec 20, 2021 12:28 pm

    These actually made a surprisingly big difference, really opened up the top end clarity and detail.
    M125 build A0d422f2a901612fc269bf632a89f8e4

    Sponsored content


    M125 build Empty Re: M125 build

    Post by Sponsored content


      Current date/time is Sat Apr 27, 2024 12:55 pm