Hi Gentlemen
At the risk of boring the heck out of you all, here is a series of photos I took during my Mark III assembly:
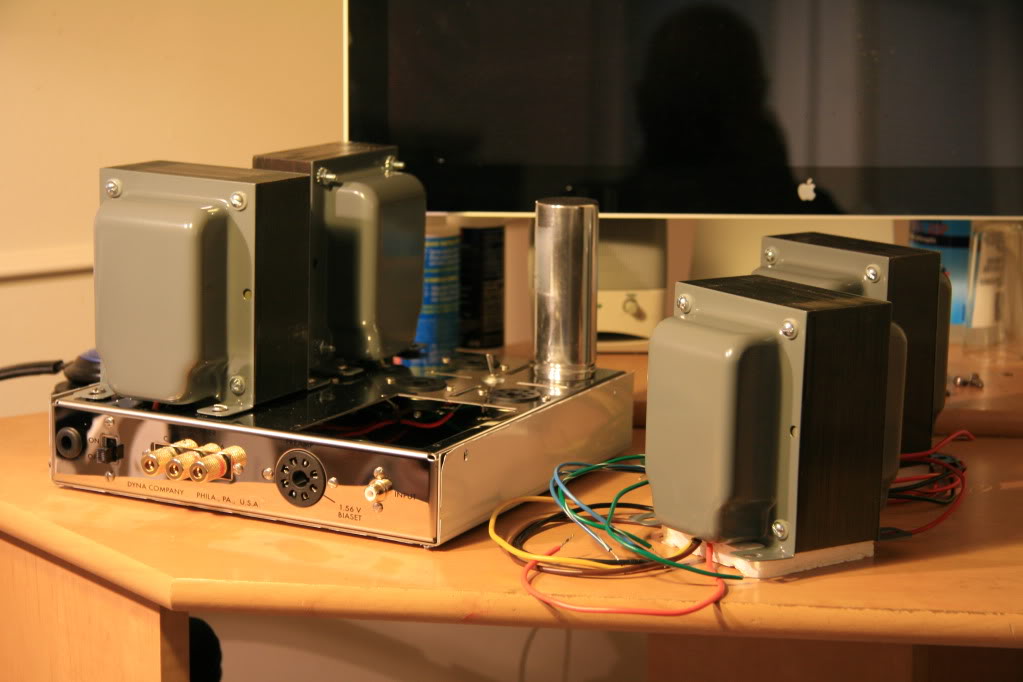
Power & O/P trannies mounted - I wanted a "classic Mark III" look so I sprayed the transormer bells the closest to the old Dynaco gray I could find (heat resistant paint, baked it according to instructions @ 300 deg. F for 3 hours!). The color balance (tungsten lighting) is pretty bad in this pic, the final pictures give a better idea of what it really looks like...

VTA Mark III board constructed, wanted to put all caps under the board but turns out the tall caps could nout fit in the avaialble space - had to move it to the top:

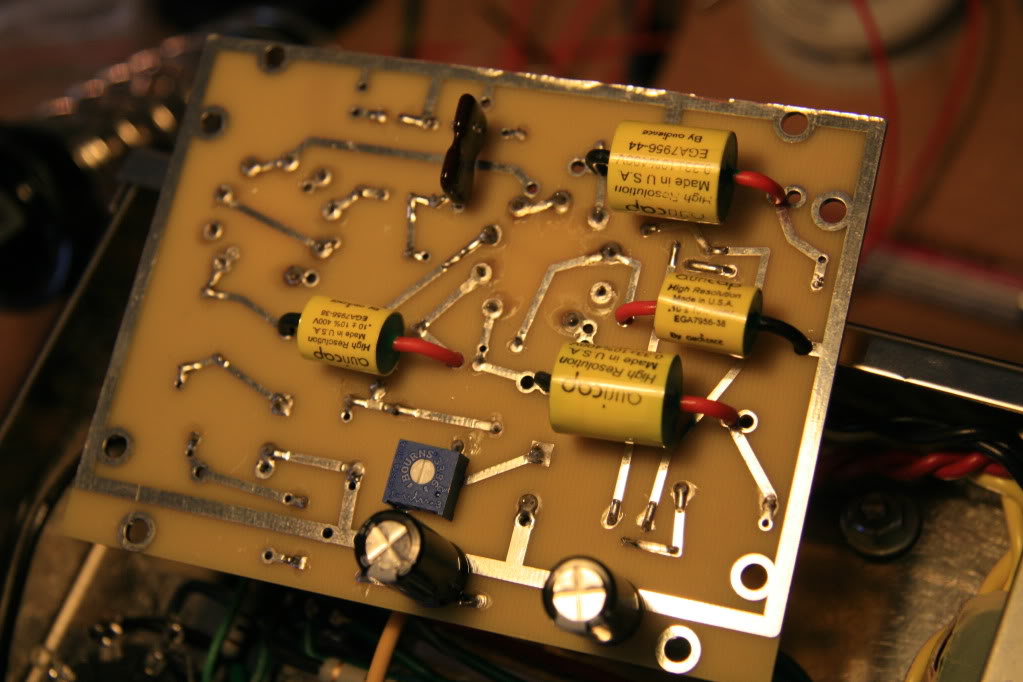
Underside of VTA boards, I went with Auricaps - NOTE: I decided to put Auricaps in the input path as well - not included in the kit - Auricaps on the two boards totalled around $100! (cheap compared to some exotic cap brands that will cost you $250 for ONE cap).

Initial wiring, I used gold-plated 3-way sockets for the speakers + gold-plated input jack:

Wiring mostly completed, has been "neatened up" considerably since this pic was taken. The location for the triode mode switch is REALLY BAD - but I didn't want to drill holes into the chassis:

Up and running! The color in this photograph is better balanced, that is the actual tranny bell color:

Making sweet music! There are a few things that bug me about the Mark III chassis layout, I wish the speaker & power connections were on the back. Ah well, a small price to pay...

....Anyway, thanks for looking & sharing my fun, folks!!
Sincerely
-- JunkyJan
BC, Canada
At the risk of boring the heck out of you all, here is a series of photos I took during my Mark III assembly:
Power & O/P trannies mounted - I wanted a "classic Mark III" look so I sprayed the transormer bells the closest to the old Dynaco gray I could find (heat resistant paint, baked it according to instructions @ 300 deg. F for 3 hours!). The color balance (tungsten lighting) is pretty bad in this pic, the final pictures give a better idea of what it really looks like...

VTA Mark III board constructed, wanted to put all caps under the board but turns out the tall caps could nout fit in the avaialble space - had to move it to the top:

Underside of VTA boards, I went with Auricaps - NOTE: I decided to put Auricaps in the input path as well - not included in the kit - Auricaps on the two boards totalled around $100! (cheap compared to some exotic cap brands that will cost you $250 for ONE cap).

Initial wiring, I used gold-plated 3-way sockets for the speakers + gold-plated input jack:

Wiring mostly completed, has been "neatened up" considerably since this pic was taken. The location for the triode mode switch is REALLY BAD - but I didn't want to drill holes into the chassis:

Up and running! The color in this photograph is better balanced, that is the actual tranny bell color:

Making sweet music! There are a few things that bug me about the Mark III chassis layout, I wish the speaker & power connections were on the back. Ah well, a small price to pay...

....Anyway, thanks for looking & sharing my fun, folks!!
Sincerely
-- JunkyJan
BC, Canada


